1. Our team will reach out in <30 minutes.
Check your inbox or phone, we’ll tailor your demo to your use case.
2. We build your custom demo
Flowcodes, FlowURLs, and FlowHubs with the data behind the whole platform - so you see exactly what Flowcode unlocks.
3. You go live in days
Our team handles setup. You handle growth.


.png)

.png)
.png)
.png)
.png)
.png)
.png)
.png)

.png)
%20copy%203.png)


Flowcode Onboarding: Managing your Flowcode

Flowcode Team
Updated
September 15, 2022
.webp)
TLDR –
Congratulations on making your first Flowcode! You’re one step closer to being a QR-code expert. In this self onboarding post we’ll walk you through how to manage your Flowcode in the code overview page.
How do I get to the "Code Details" page?
Step 1: Upon logging into your Flowcode account, you’ll be brought to your Flowcode dashboard. Click on the left-hand side tool bar and select "Assets" and "Flowcodes".
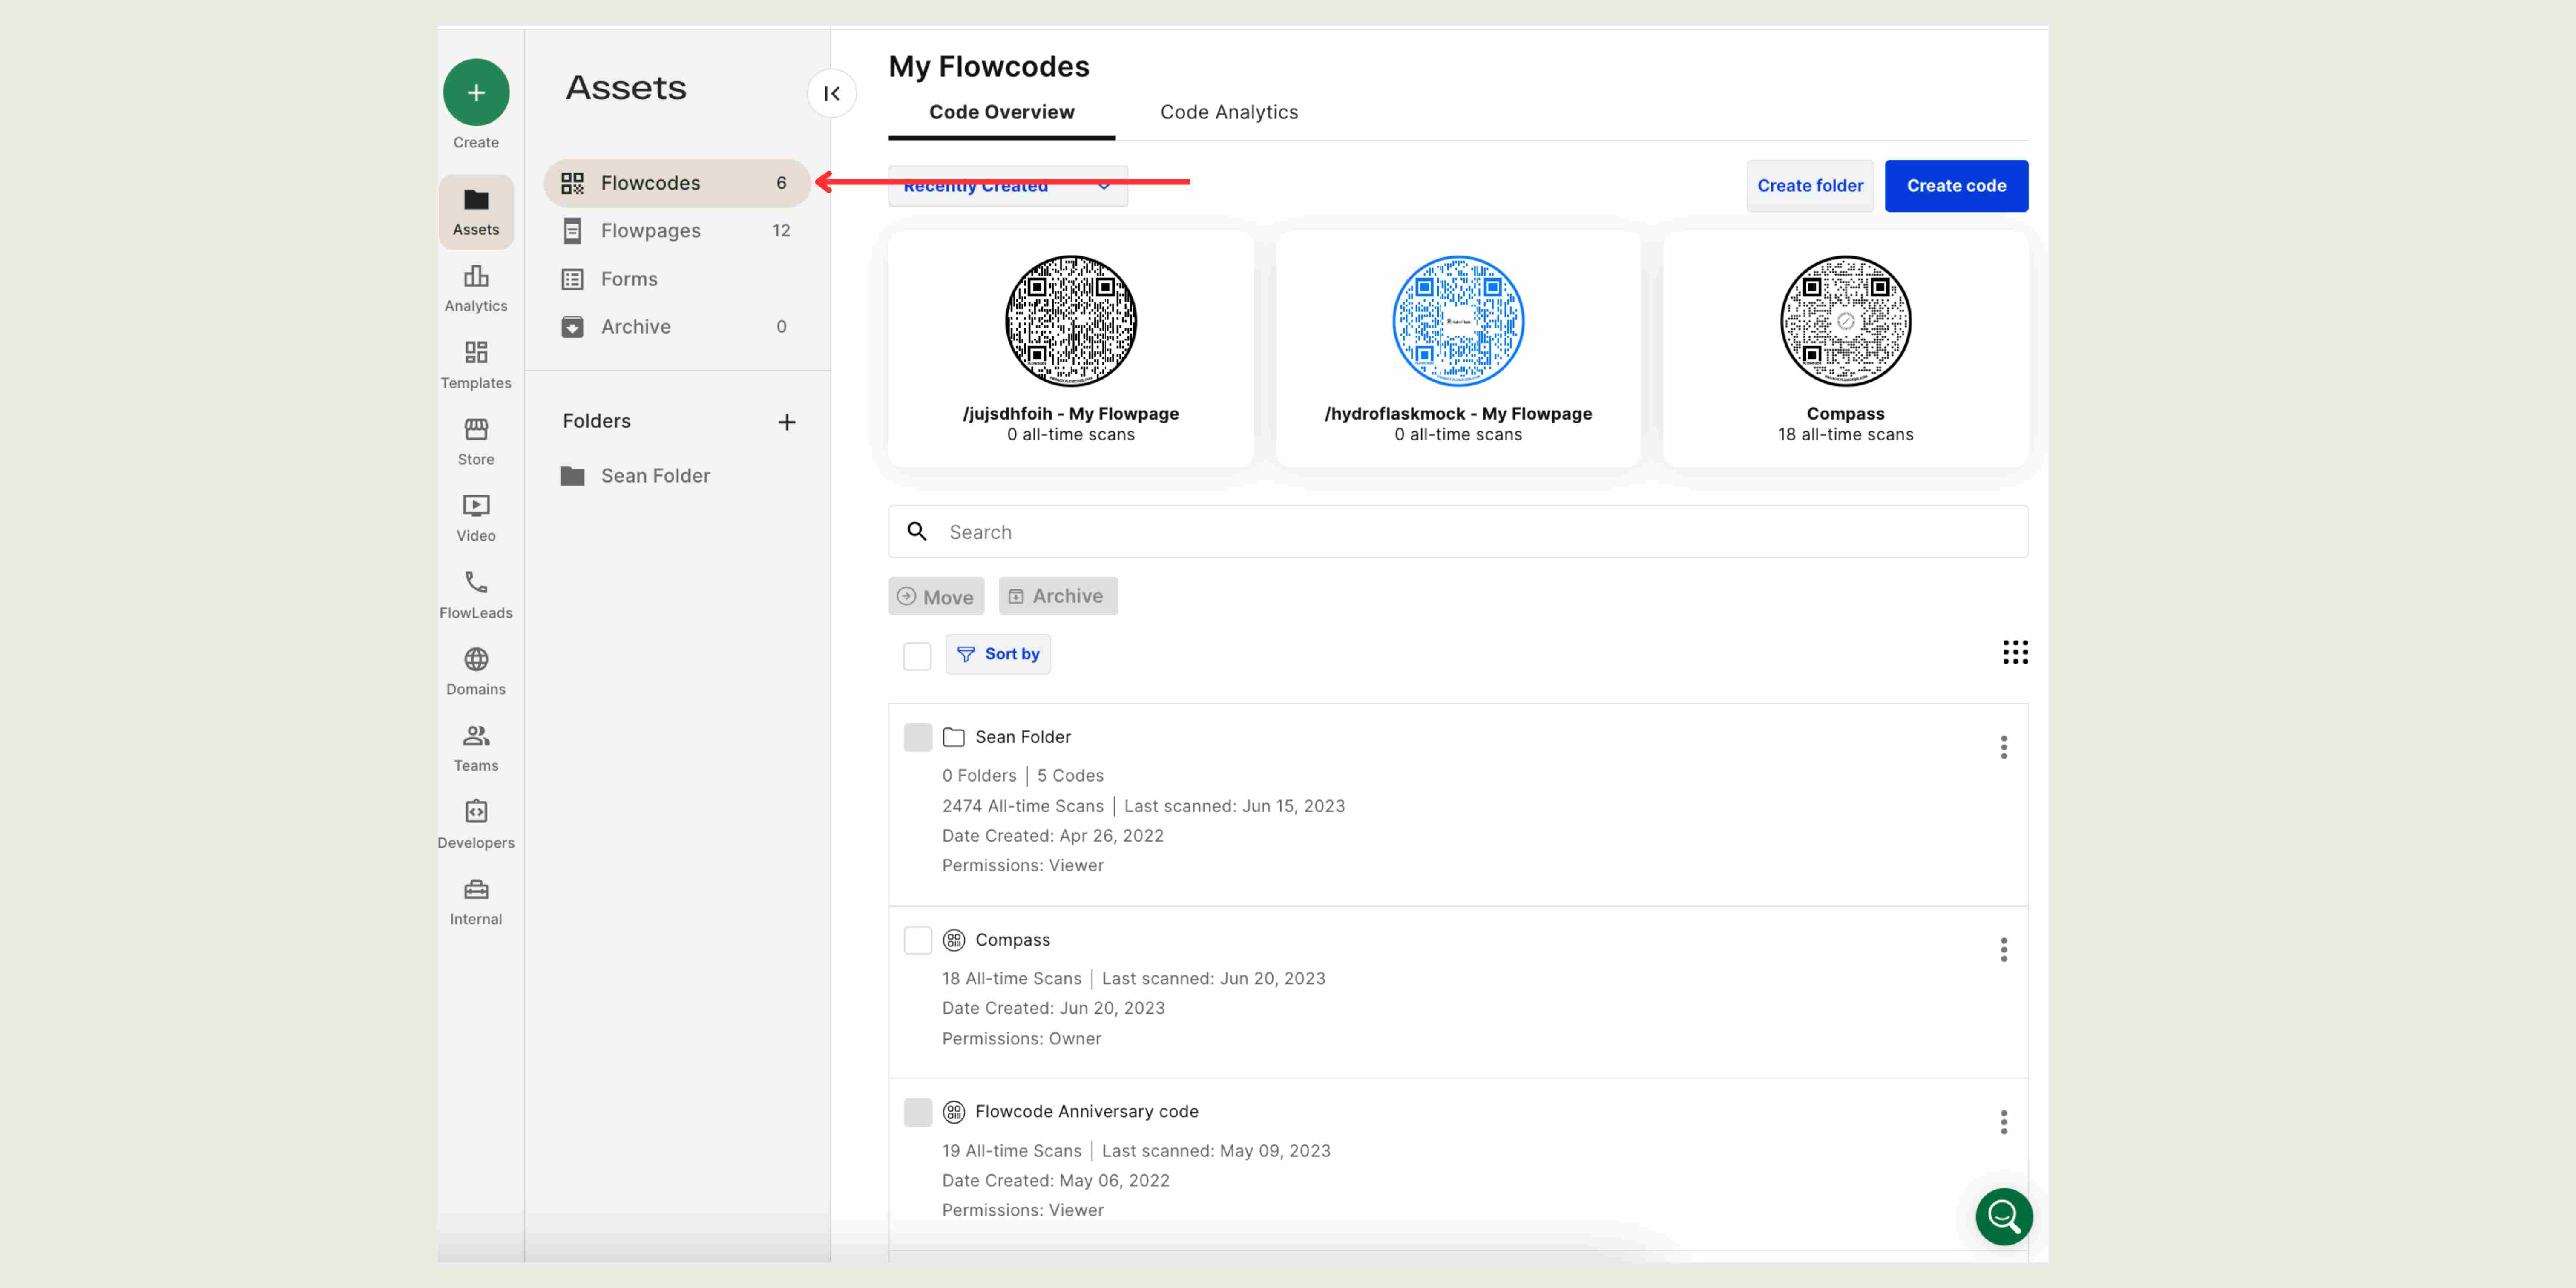
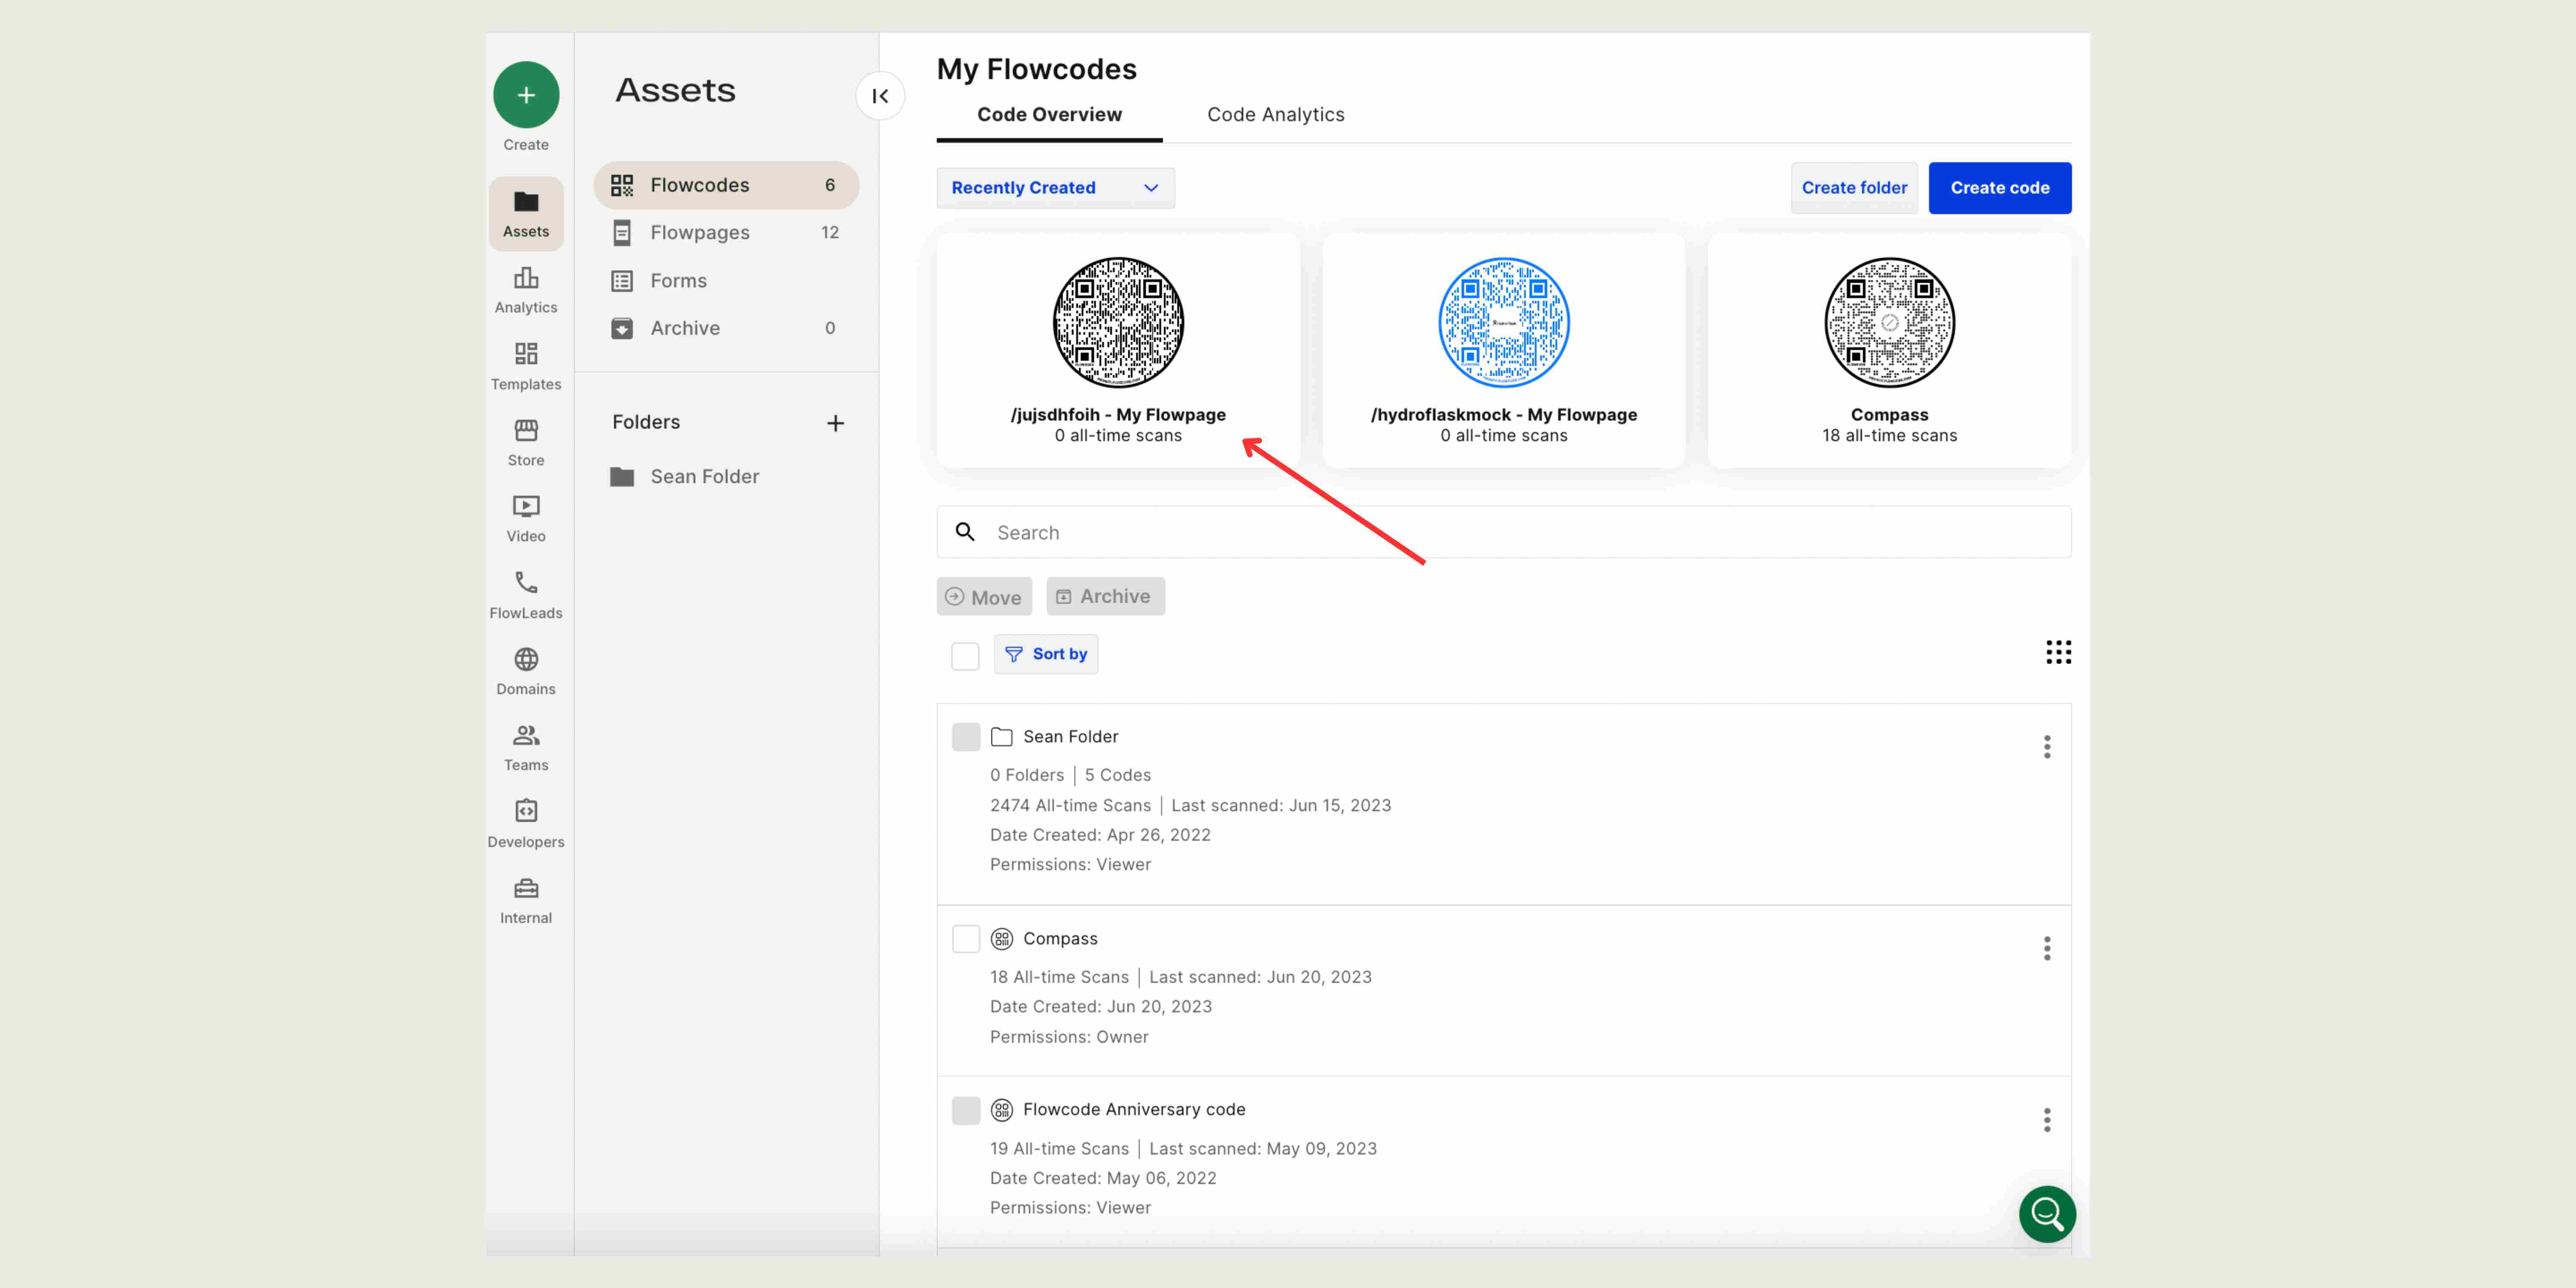
Step 2: After accessing assets, you will see the Flowcodes you have created. You click on one to see further insights into it.
Step 3: Upon clicking on the code, you will be re-directed to the "Code Details" page:
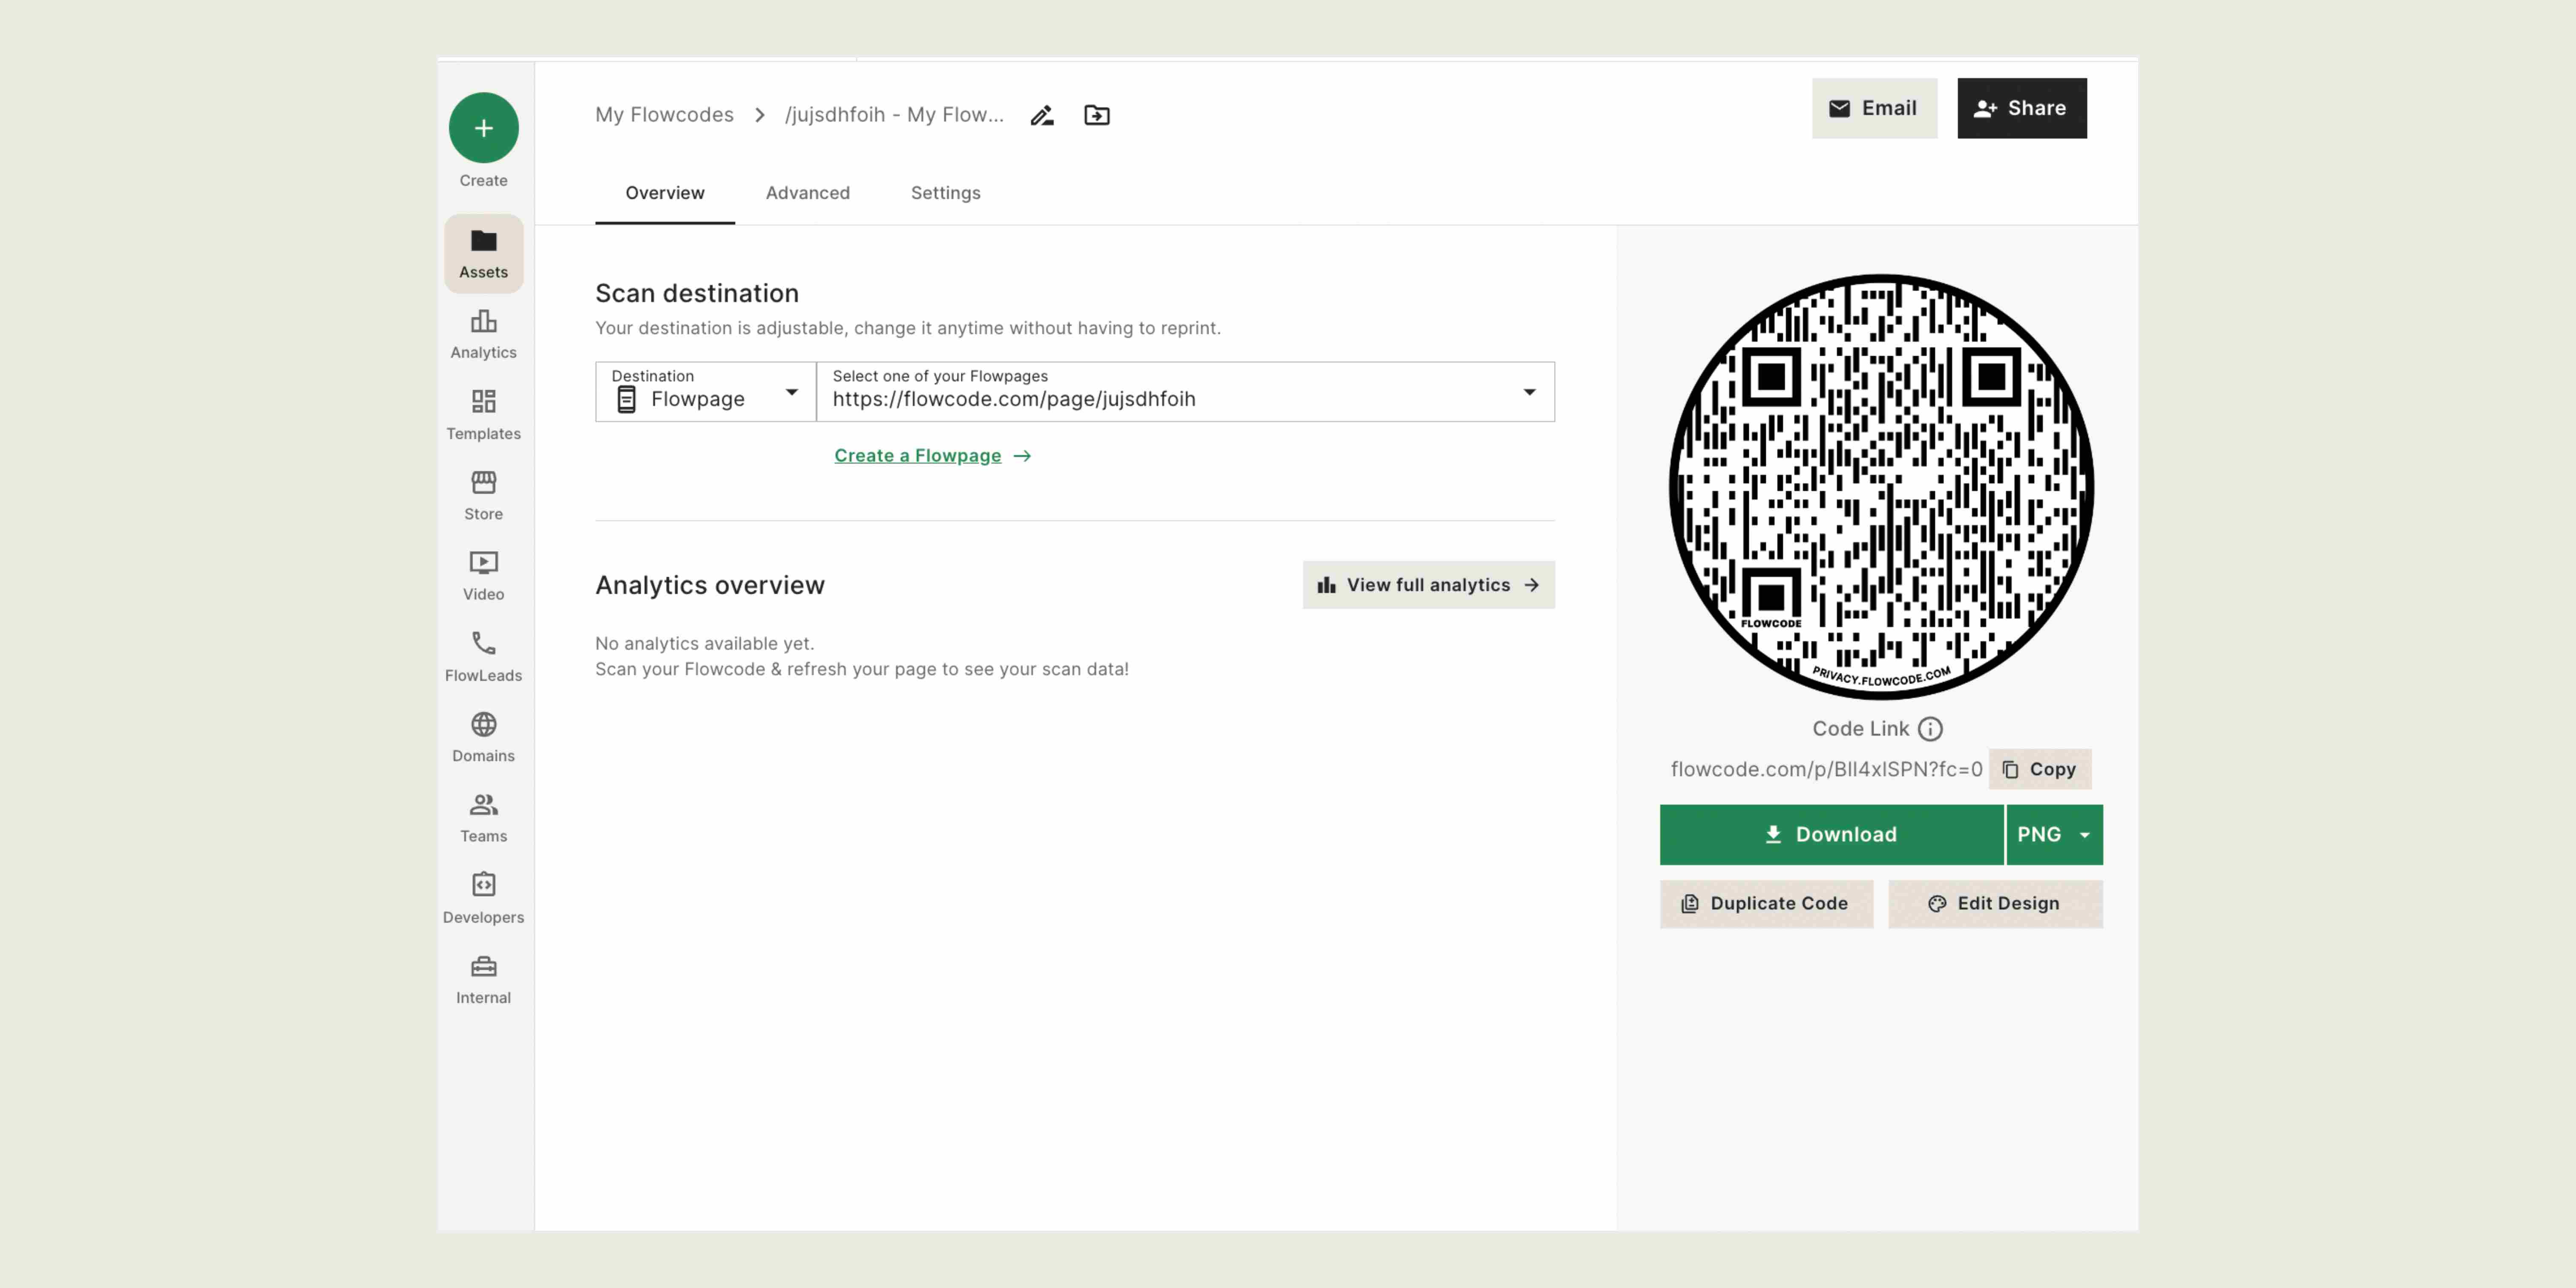
Once here, you have the ability to change the scan destination of your code, edit how it looks, and more!
Now we’ll walk you through each of the dropdowns and what capabilities they have:
I. Overview
%2520copy%25202.jpeg)
This page enables you to take high level actions like downloading and editing your codes. Here you can:
1. Download your code
The ‘Download’ on the right-hand side of the screen is where you’ll discover how to print, download, and bring your Flowcode into the real world.
%2520copy.jpeg)
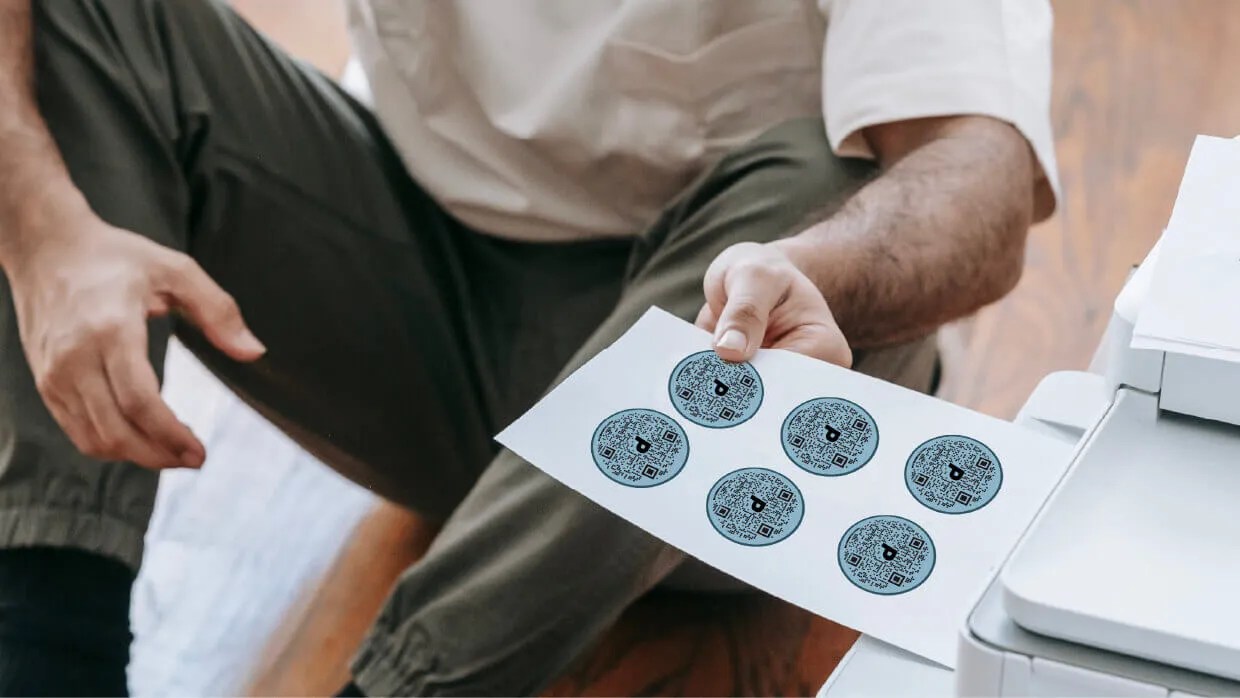
Adding code to assets
If you’re interested in adding your Flowcode QR-code to your assets, you can download it directly from the code overview page. Next to the ‘Download’ dropdown, click on ‘PNG’. This will prompt you to select which file format you’d like to download the code as:
%2520copy%25206.jpeg)
- PNG: 300 DPI transparent. High quality file with a transparent background. Typically used the most in web, design and print materials. The image can be easily placed over a background of a picture, block of color or pattern.
- JPG: Your basic image file type. Flowcode JPEG comes with white background, not a transparent background like with a PNG. Quality is significantly lower than PNG files.
- SVG: (Scalable Vector Graphic) for placement on high-resolution artwork intended. When using your Flowcode for printing on merchandise and other mediums, printers may request this file type because it allows you to open in Adobe Illustrator and interact with individual layers. Not suitable for photos as they are meant for dealing with figures, lines, etc. for print and merchandise.
- EPS: A file intended for professional and high-quality image printing. Used to produce attention-grabbing, detailed images such as billboards and large posters.
- PDF: A high-quality document file. Used most commonly for email and print.
Transparent background: (PNG, SVG, and PDF)
For print materials, such as flyers, business cards, or brochures, we recommend PNG files. For larger assets, like billboards or banners, an SVG would be the best option. If you’re ever unsure, ask your printing partner which file type they need.
The code will automatically save to your device upon clicking ‘Download’. You can then access it from your device’s ‘Downloads’ folder.
Learn more about printing best practices in our Flowcode Onboarding: Printing your Flowcode post.
2. Copy your code link
%2520copy%25204.jpeg)
When you are ready to share your code, the "Copy Code Link" feature allows users to easily copy the code link to their clipboard. This convenient option simplifies the process of sharing the code link across various platforms, including emails, social media posts, messaging apps, and more.
3. Duplicate your code
%2520copy%25205.jpeg)
The "Duplicate Code" feature provides a hassle-free way to create a new code that maintains the same design and scan destination as the original code. This functionality allows you to effortlessly generate multiple unique codes while keeping track of individual scan statistics for each code.
4. Edit code details
1. First and foremost, you can edit the name of the Flowcode.
2. Second, as mentioned in Flowcode Onboarding: Creating your first Flowcode, all Flowcodes are dynamic. This means that you can update their scan destination at any point and as often as you’d like. Changing a Flowcode QR-code’s scan destination can be done within the ‘Edit code details’ section of the code Overview page. Click the dropdown next to Scan Destination’ to see all the same options that first appeared when creating the code (i.e., Website, File, SMS, etc).
3. Third, edit or adjust the code’s tags.
4. Fourth, with Pro+ or above, you can change the Flowcode’s redirect link. It’s best to apply your custom redirect when first creating the code. However, you can update the redirect subdomain for an existing Flowcode to use a different subdomain, although if this code has already been downloaded and/or printed, you will need to re-download and/or re-print it. Otherwise those previously downloaded or printed instances of it will continue to go through the old redirect.Learn more about custom redirects here or email [email protected] with any questions.
5. The fifth, but the most important step, is to click the black ‘Save Changes’ button. This will update your code in real time. This means that all the materials you put out into the world that contained the code will now scan to the new scan destination.

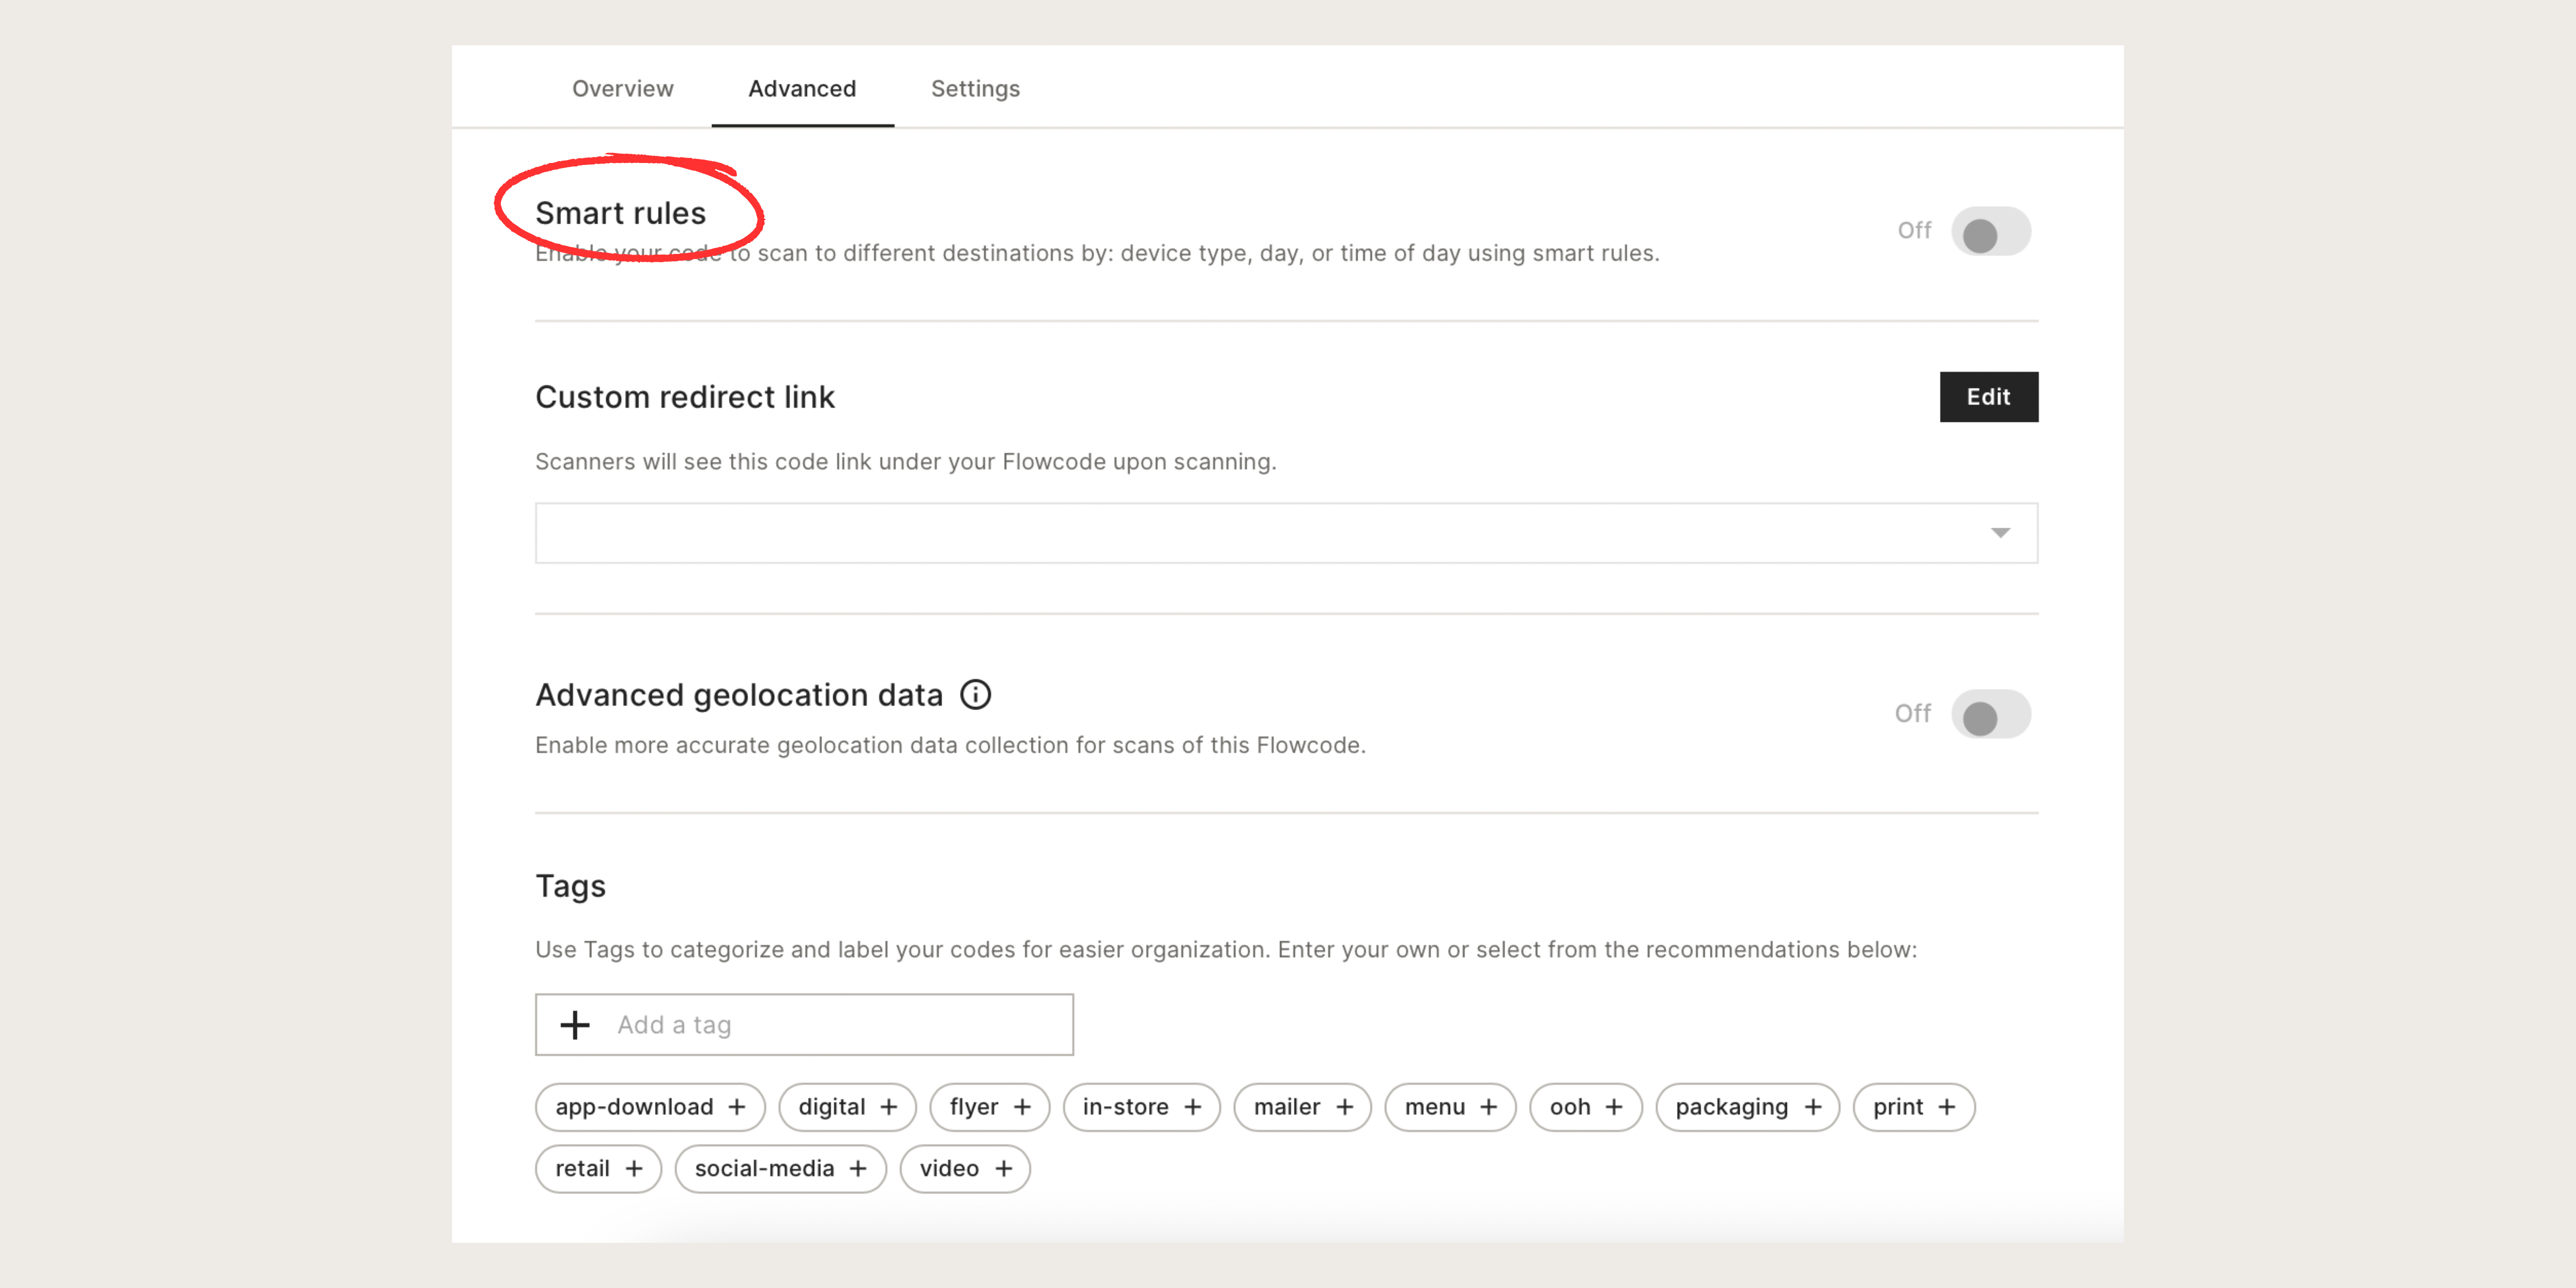
II. Advanced
In the 'Advanced' dropdown, users with paid plans have access to features such as smart rules, custom redirect links, and tags for their codes.
%2520copy%25203.jpeg)
Smart Rules
Users are able to set multiple end destinations and conditions for a single code without having to create an entirely new one. You are able to create a Flowcode that redirects users to a different destination based on things such as time of day, day of the week, or the scanner’s device type, to name a few. Learn more about smart rules here!
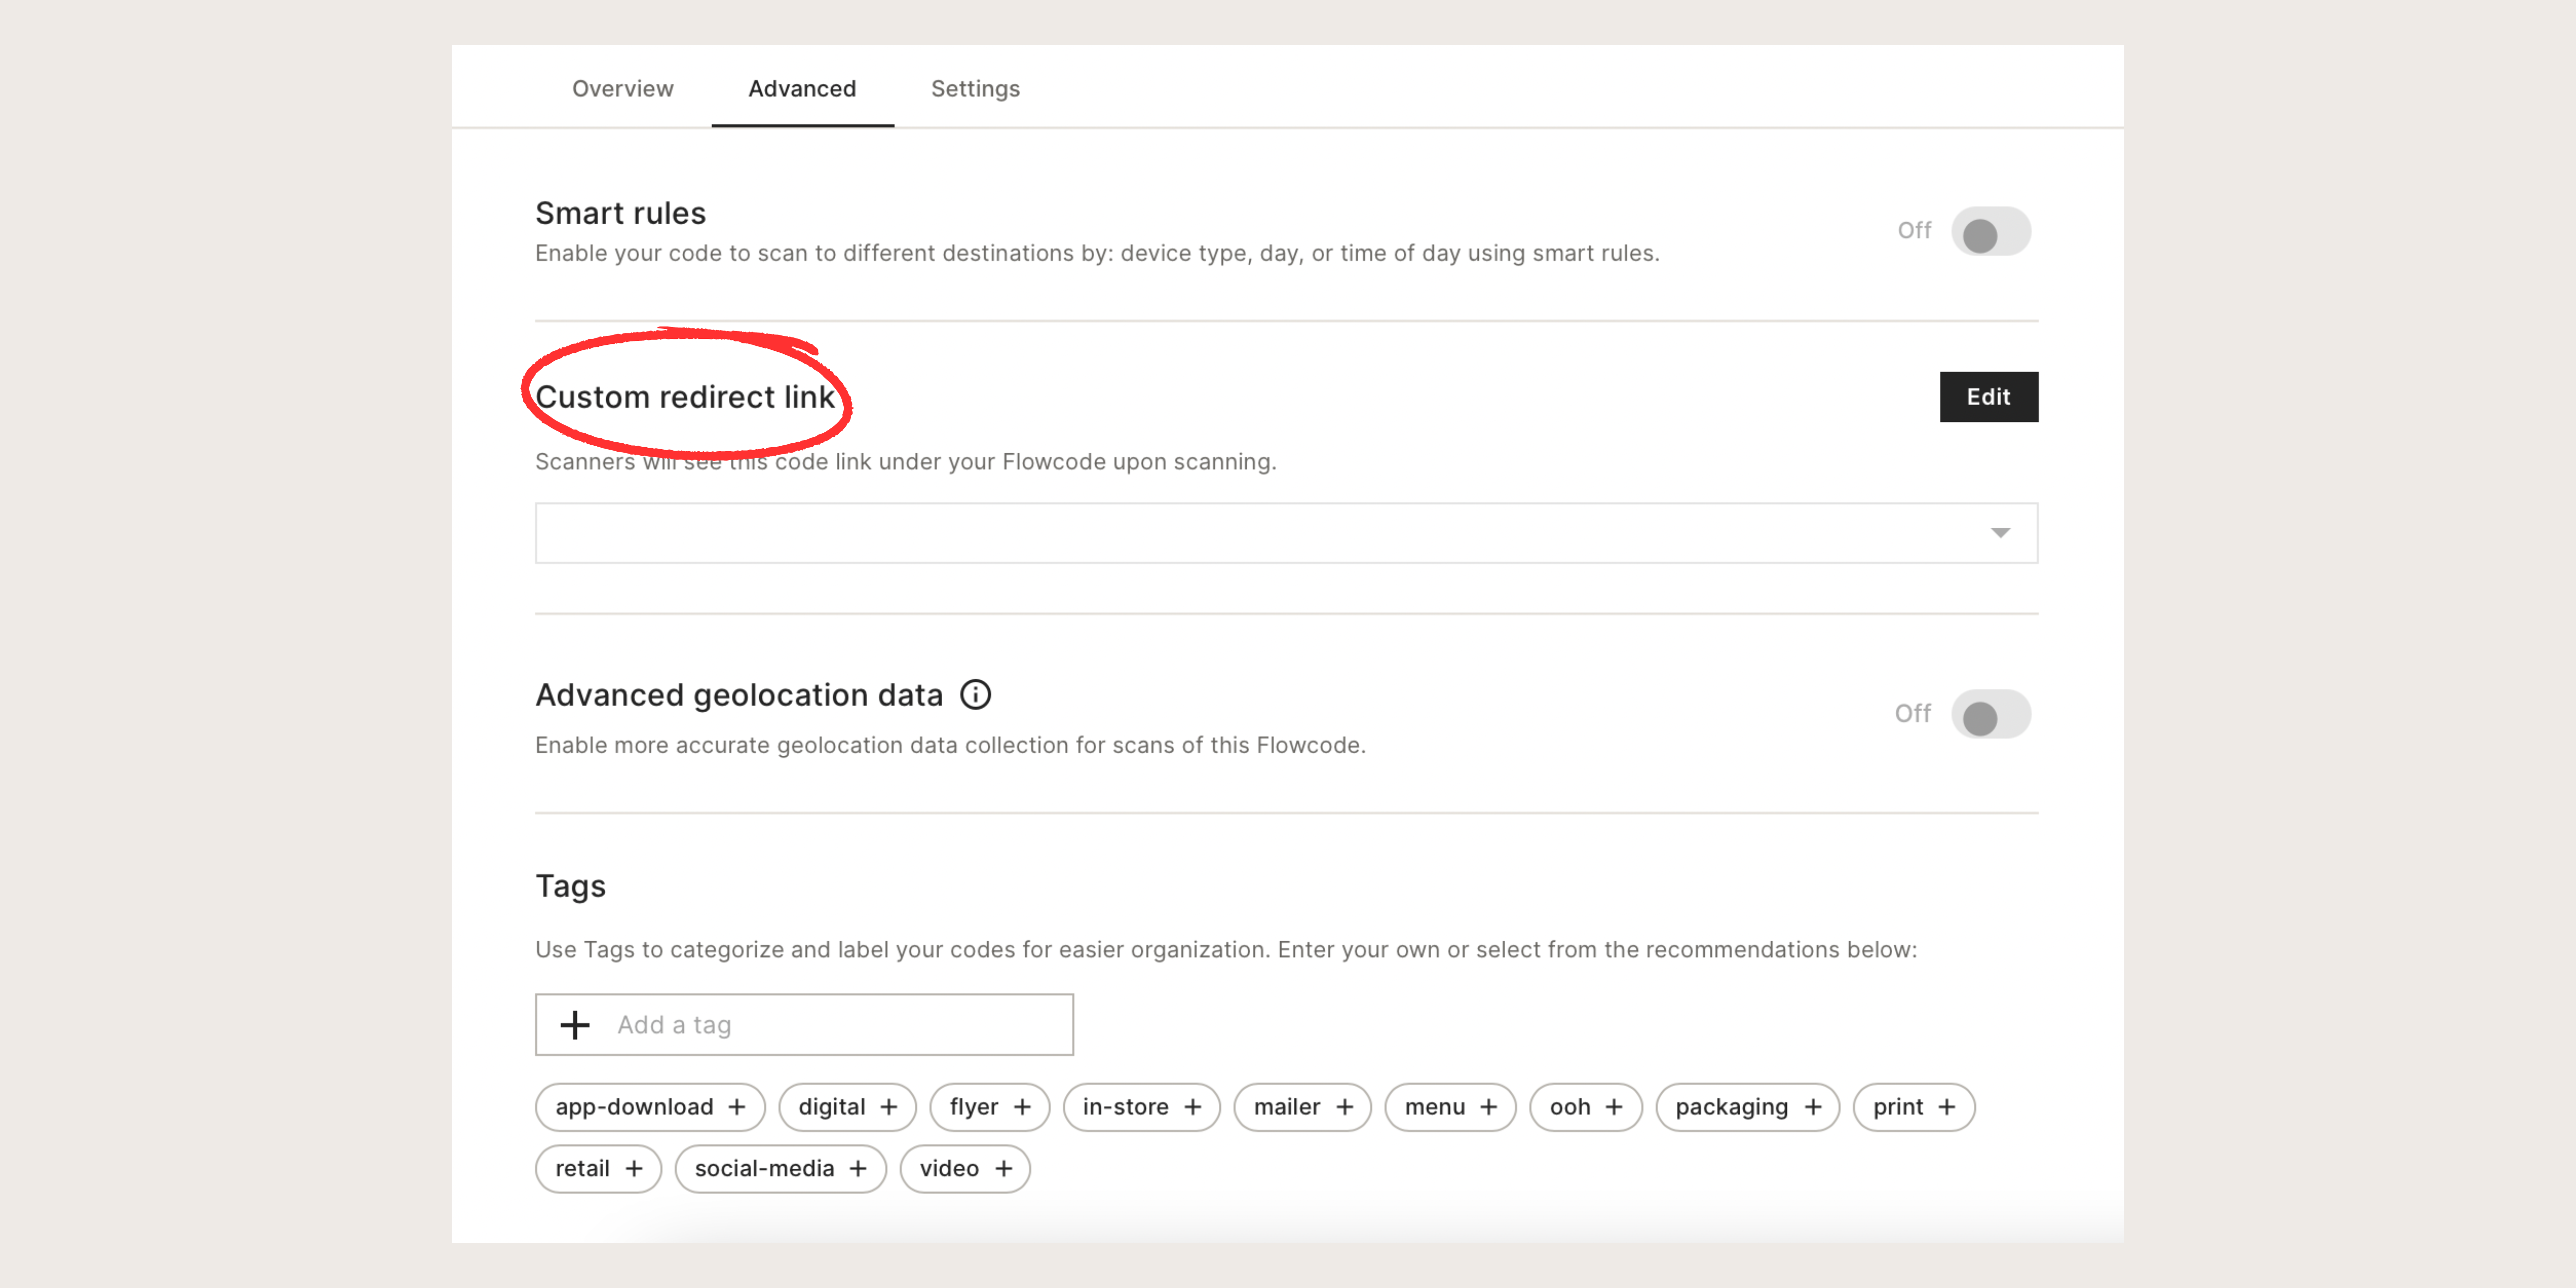
Custom Redirect Link
A custom redirect link is a URL that you can specify to be the destination of a Flowcode scan. This allows you to redirect scans from your codes to a domain that is not connected to Flowcode. To create a custom redirect link, you will need to have a Flowcode Pro+ or above account.
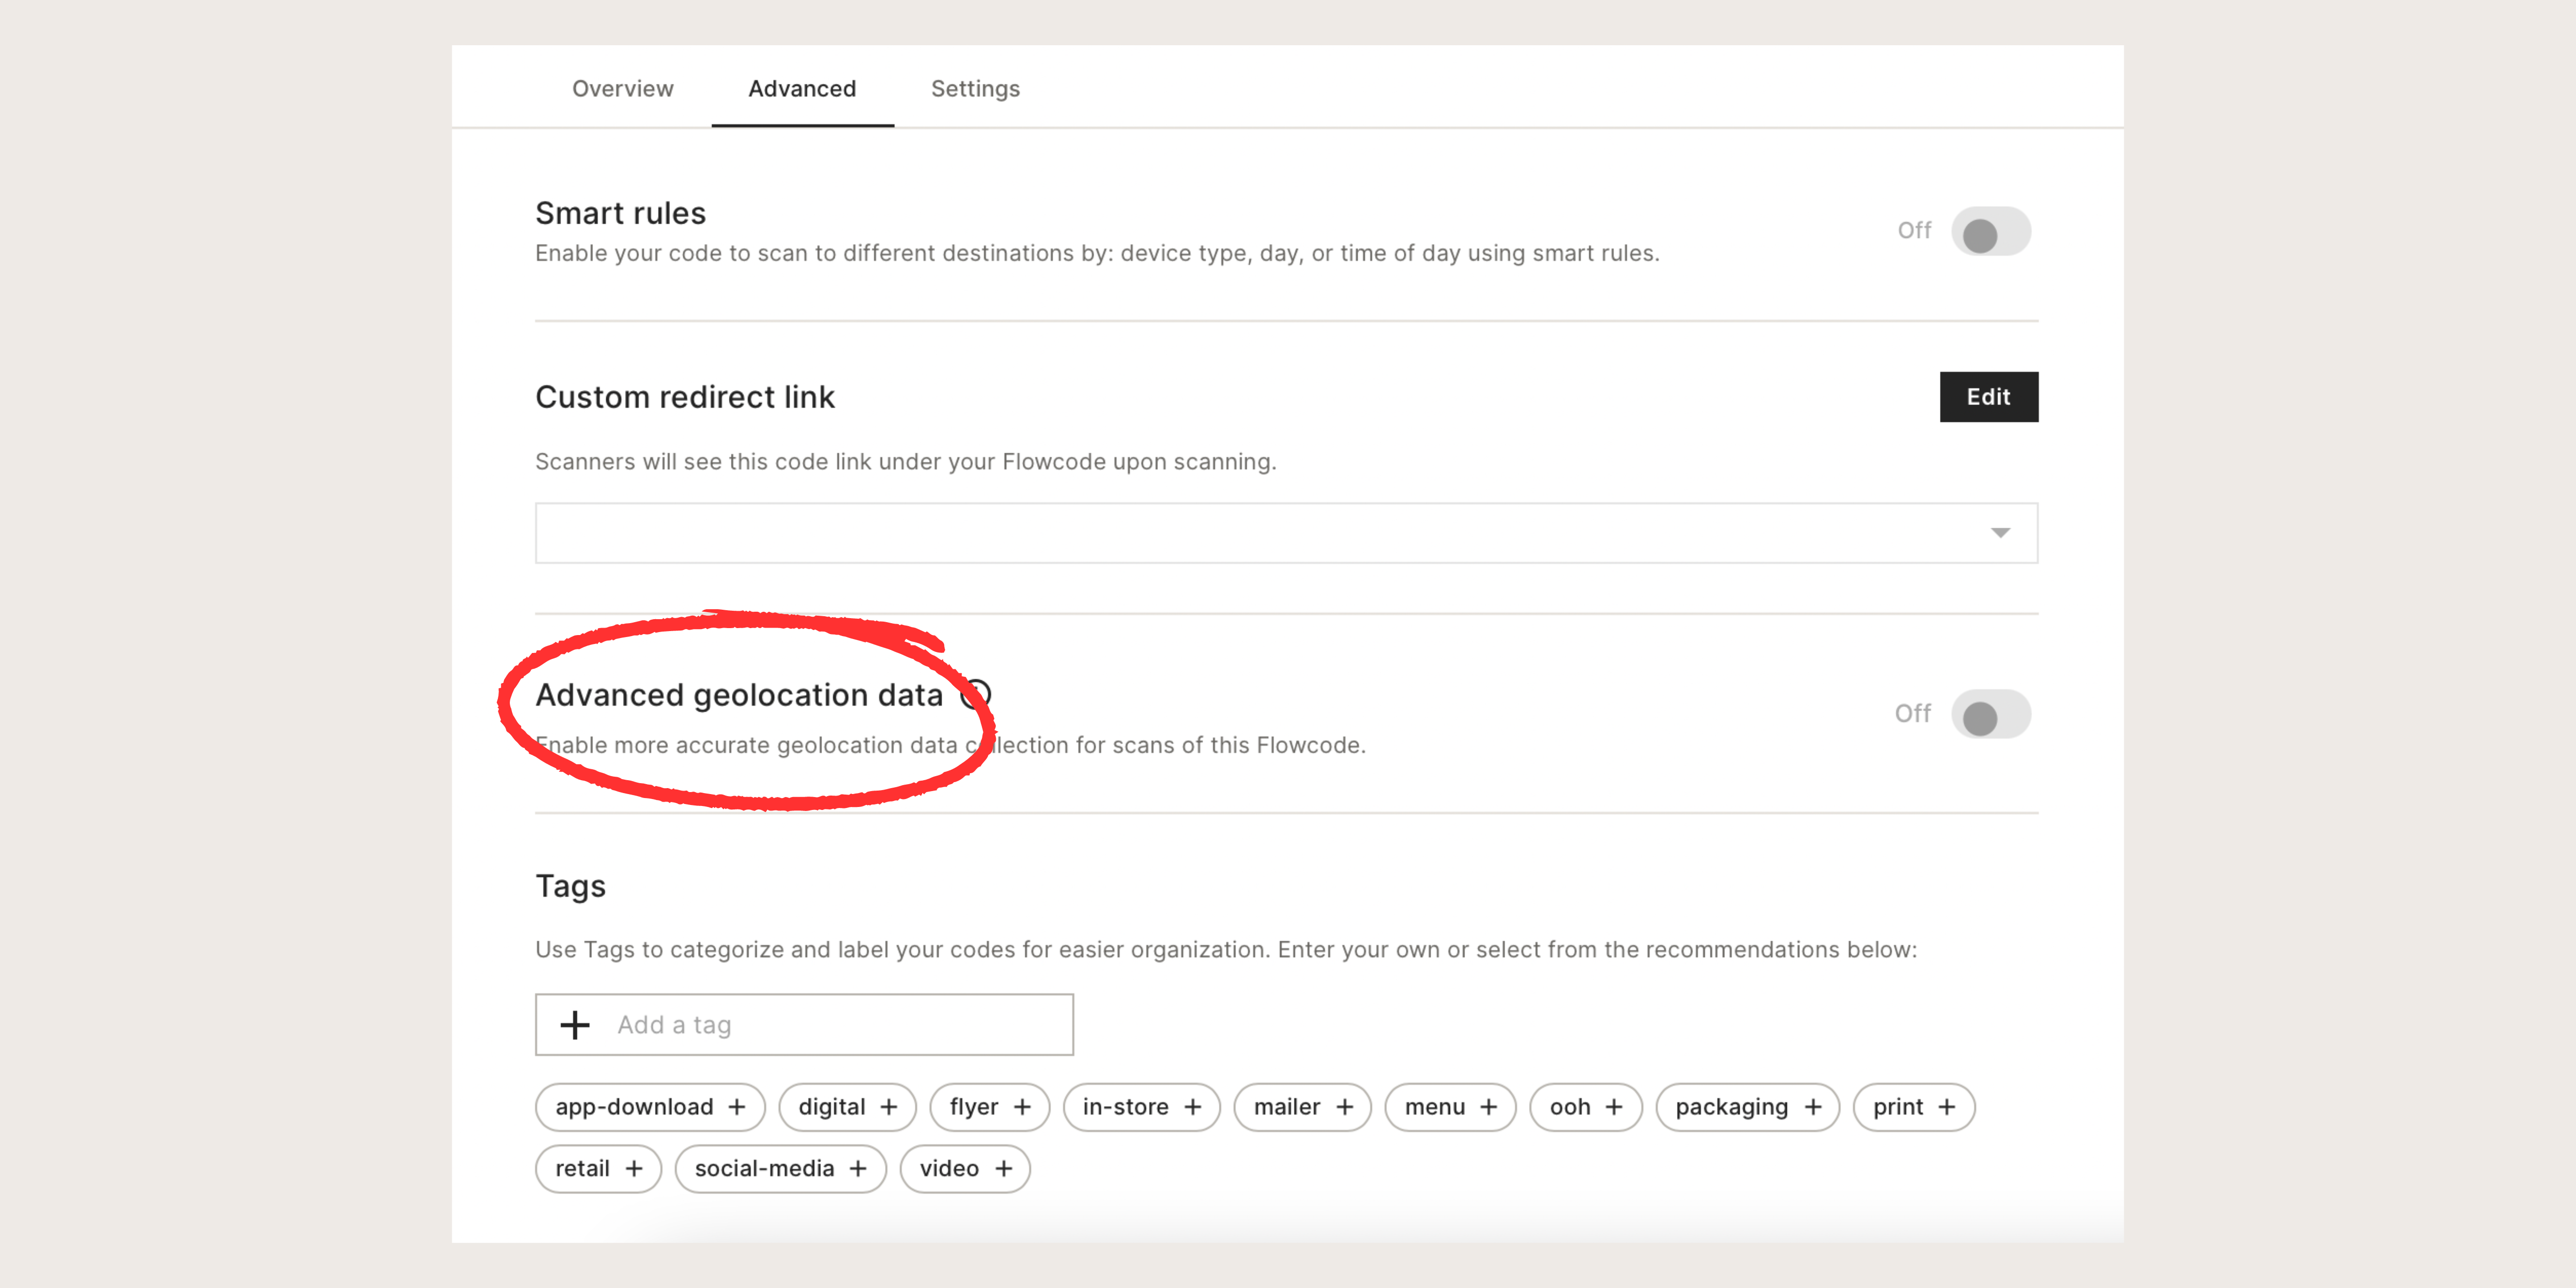
Advanced Geolocation Data
By activating this feature upon scanning your code, consumers grand you access to their most precise location data, allowing you to gain invaluable insights to help amplify the growth of your brand.
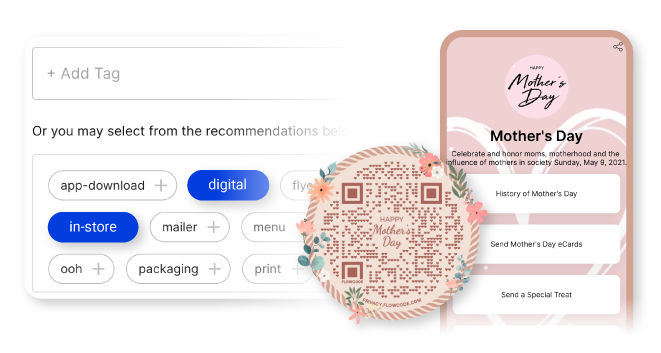
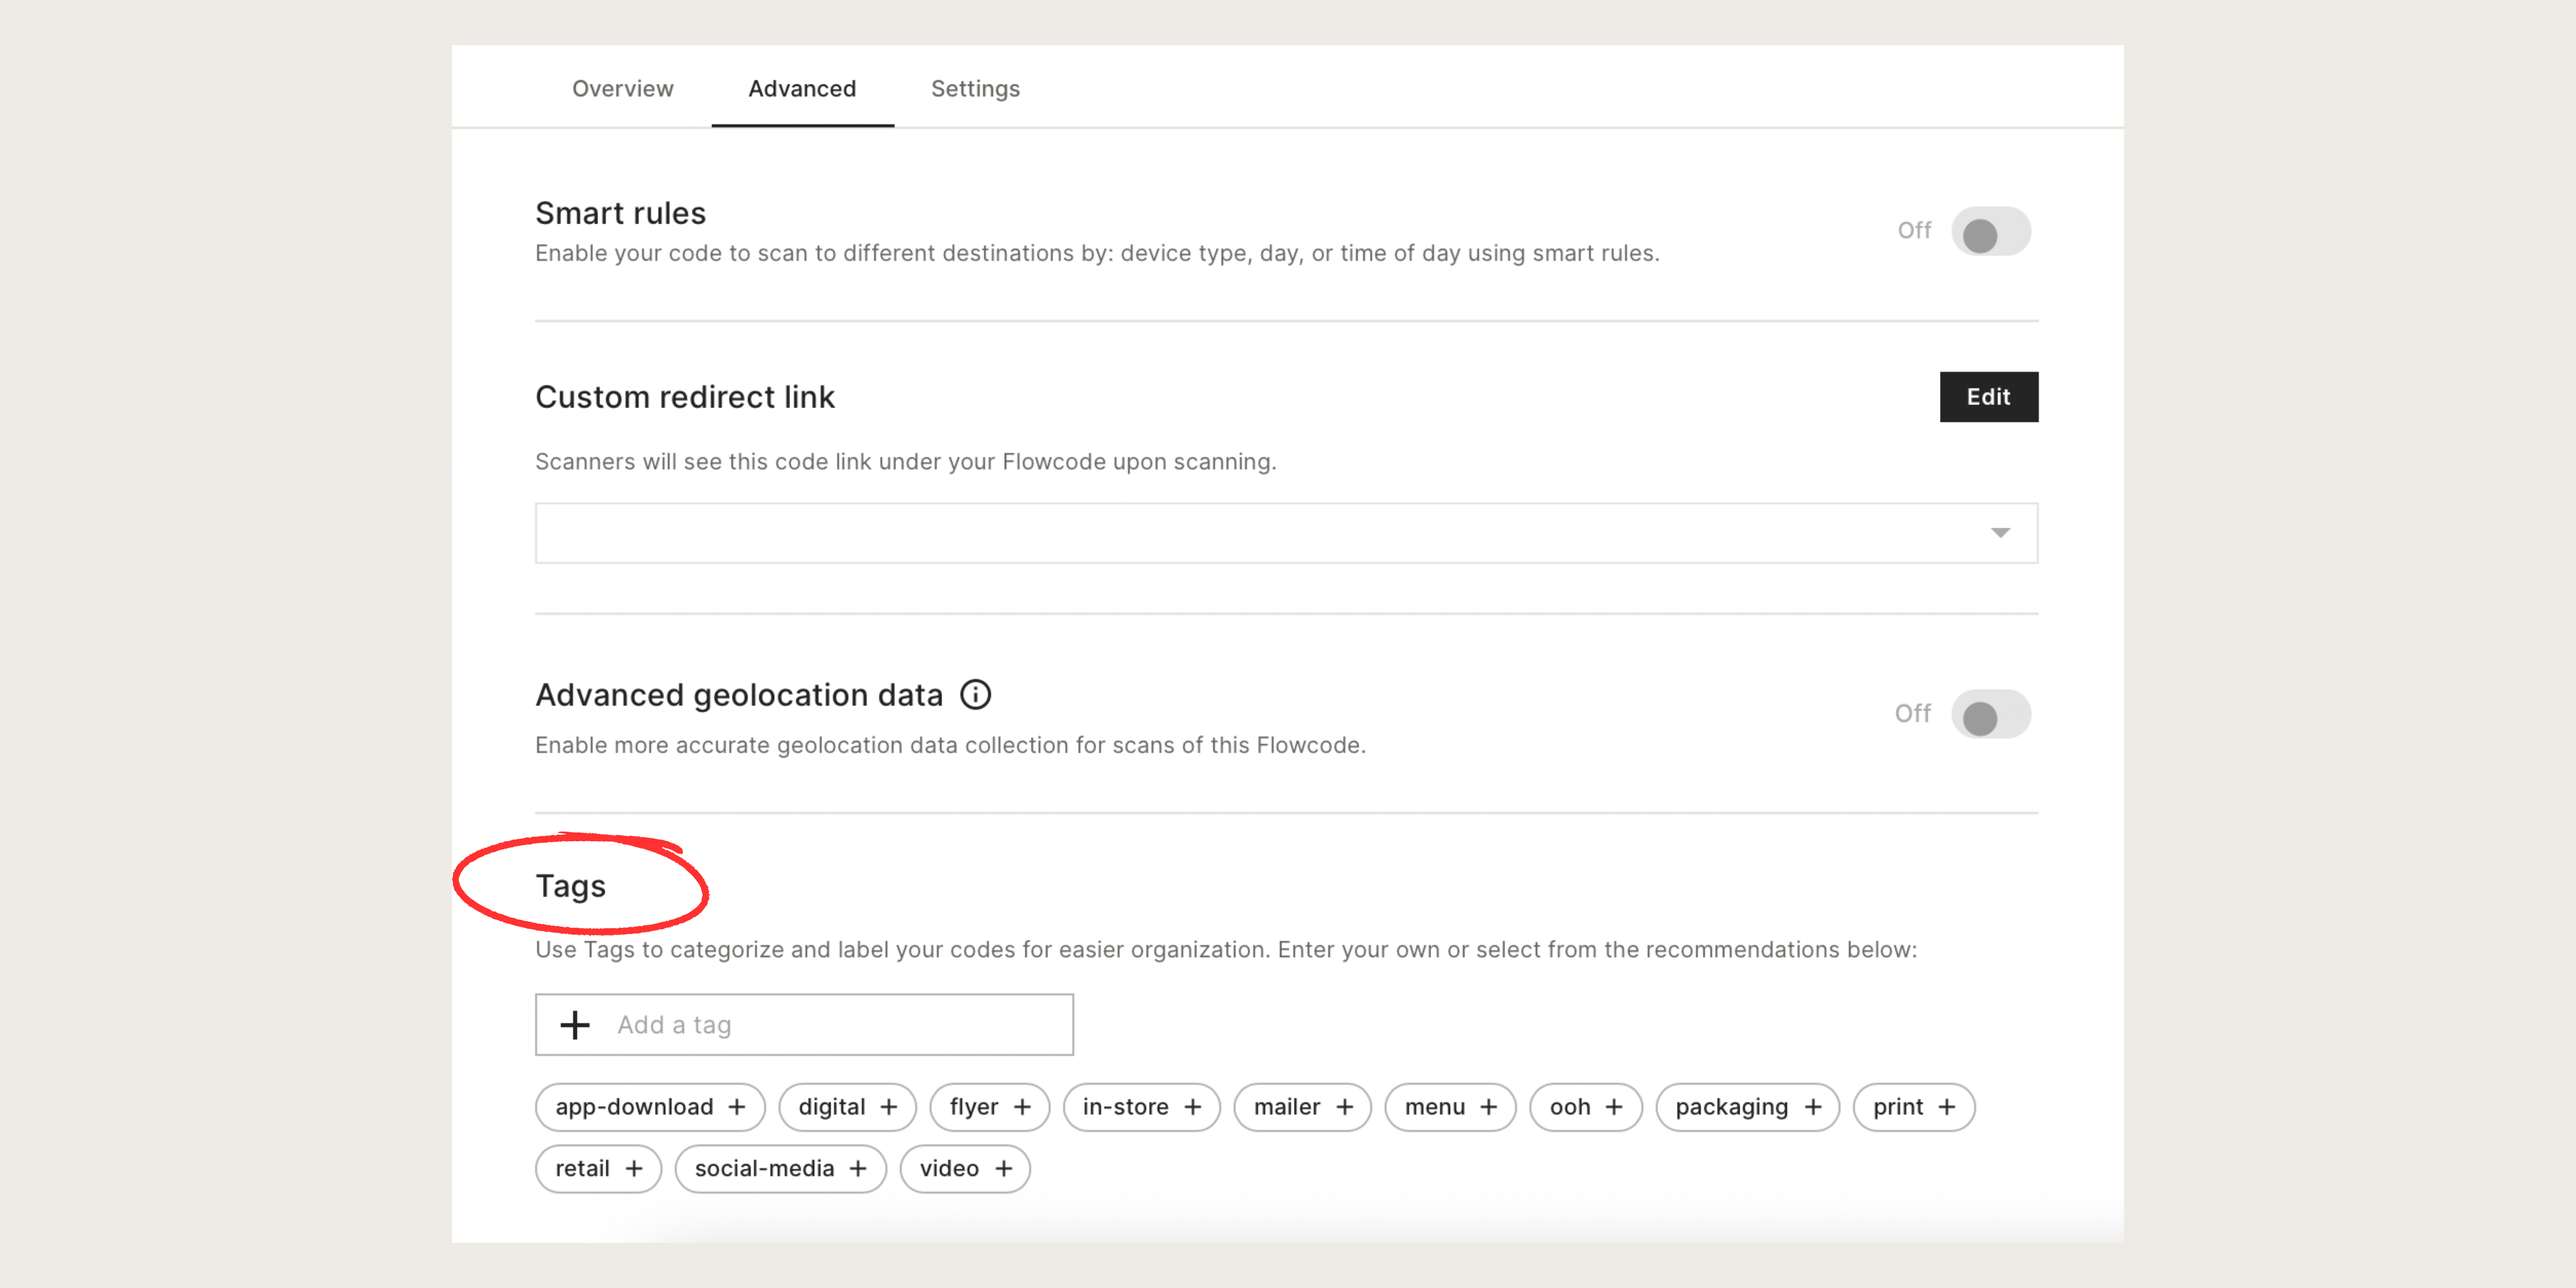
Tags
Users have the ability to assign various tags to their Flowcodes, facilitating their categorization and labeling. This useful feature ensures optimal organization for all of your codes.
III. Settings
The ‘Settings’ dropdown is where you’ll find all the design-related Flowcode management tools. Quickly change the color of your code to match your new branding, save your design as a template to apply to future codes, easily duplicate your code, and more.
%2520copy%25202.jpeg)
Manage Access
In the "Manage Access" section, users can easily share their Flowcodes with others, granting them access and collaboration privileges. This feature allows for streamlined workflows and efficient coordination among team members or departments involved in marketing campaigns or customer engagement initiatives. Users have the flexibility to selectively share their codes with specific individuals or teams, or even with the entire Flowcode community for broader reach.

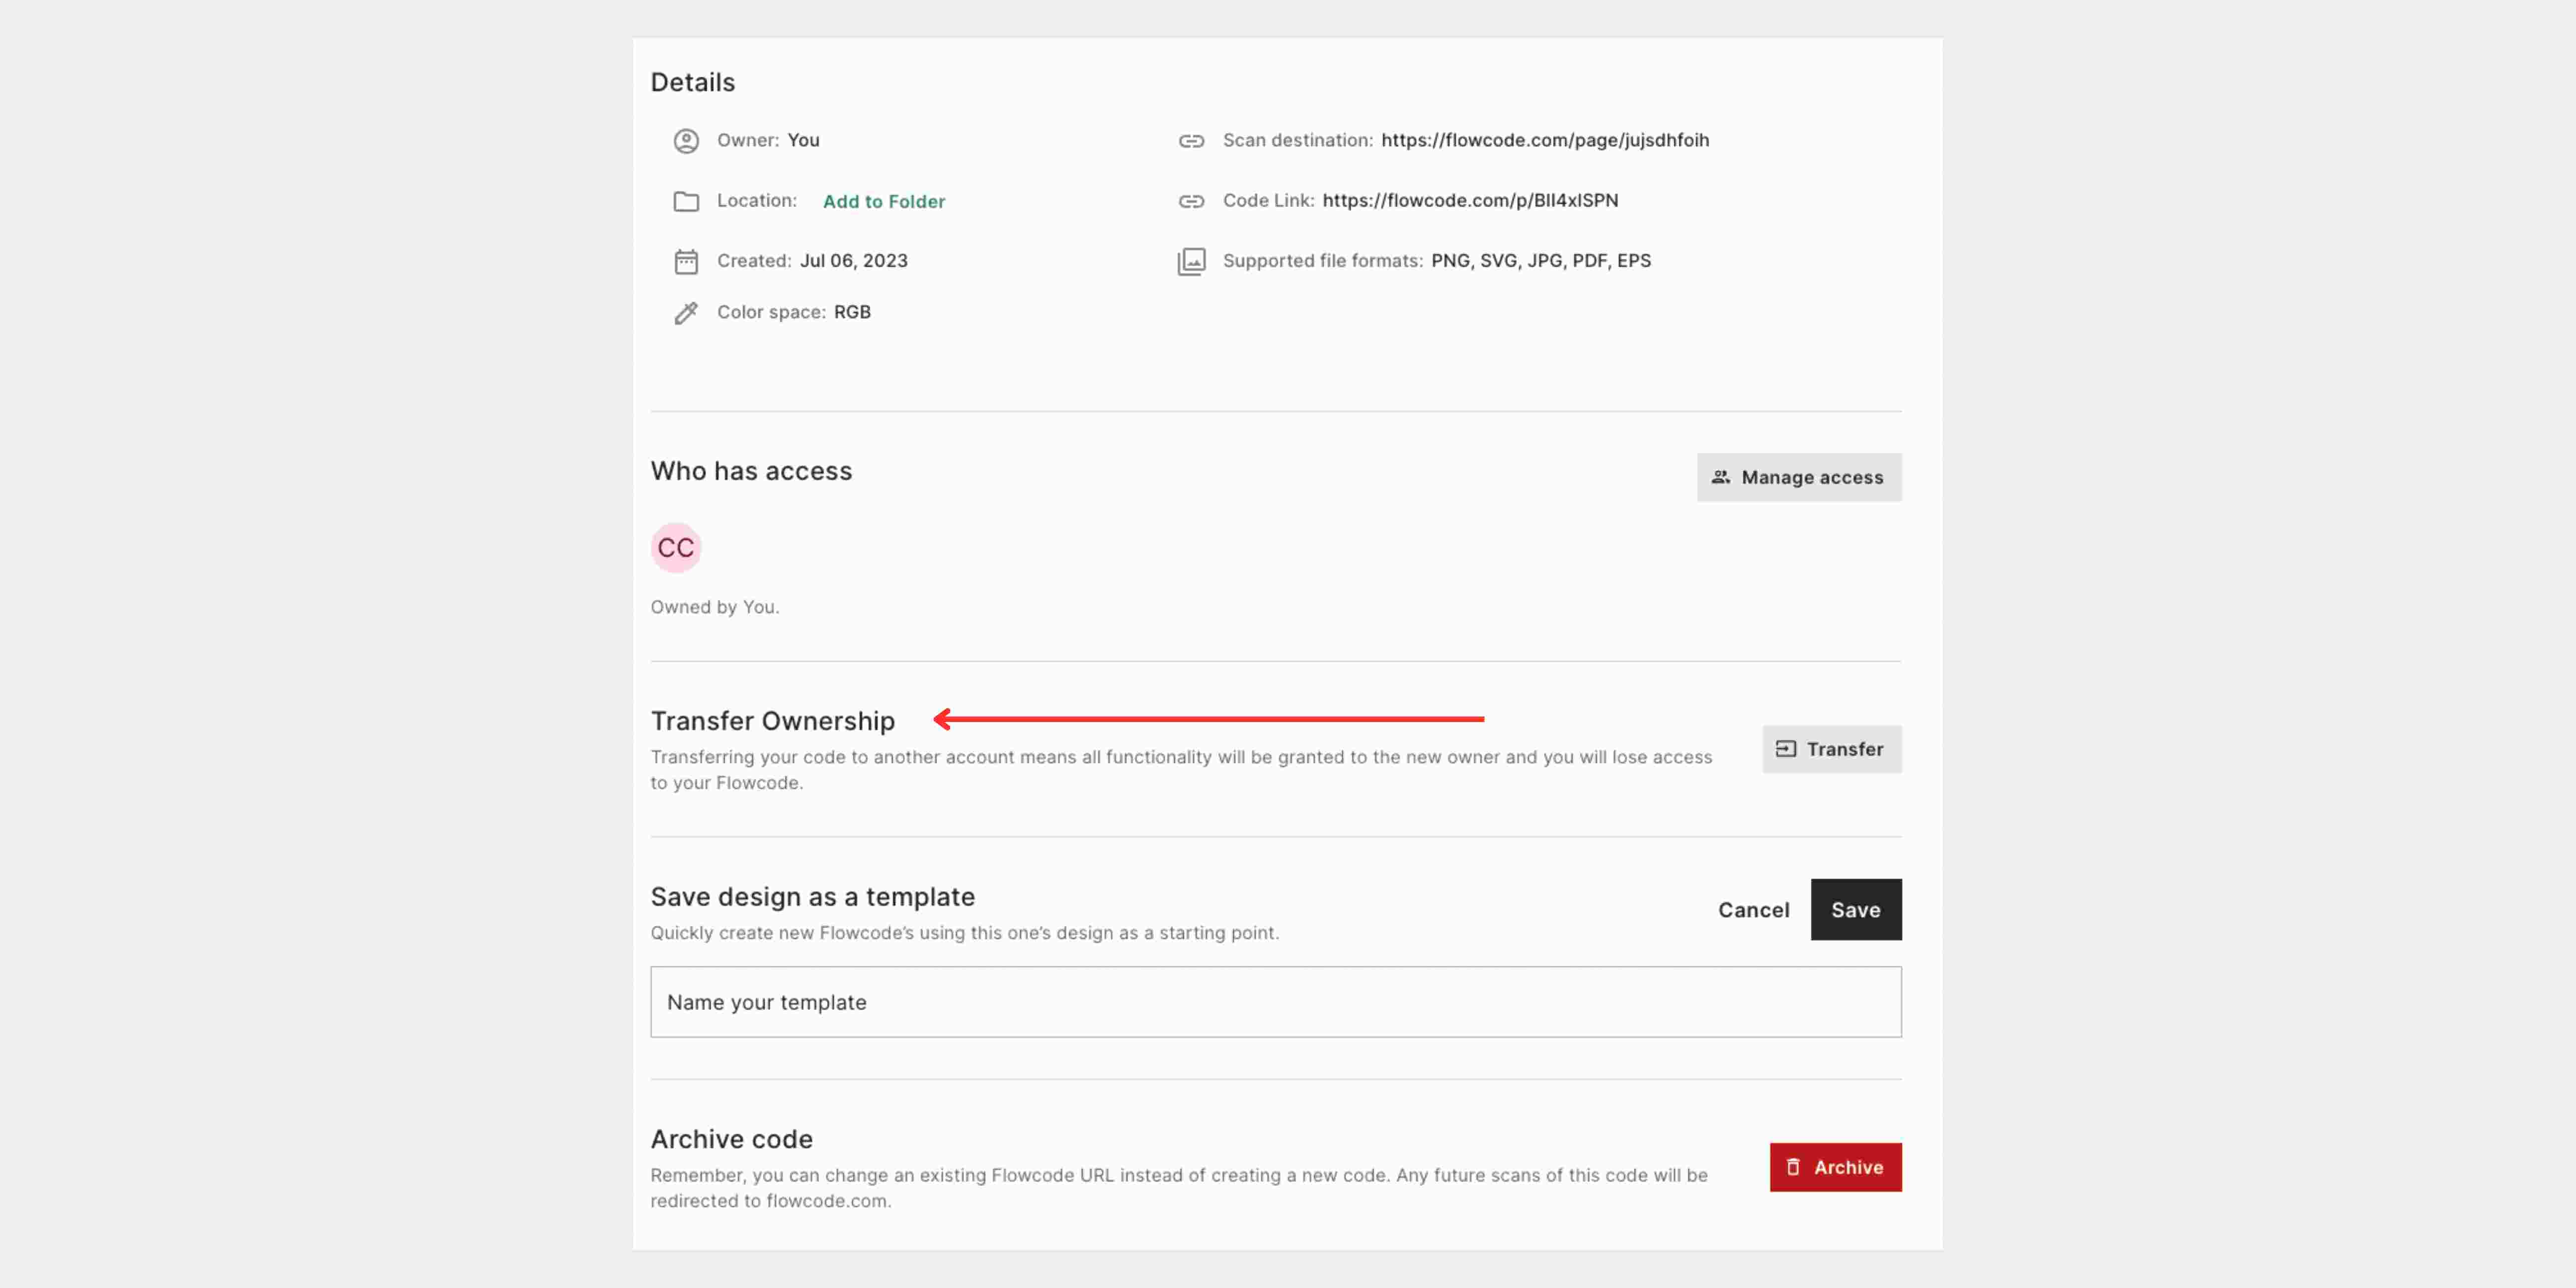
Transfer Ownership
Transferring your code to another account can be a useful feature in certain scenarios. It allows you to grant full functionality and ownership of your Flowcode to a new user, enabling them to manage and control the code moving forward.
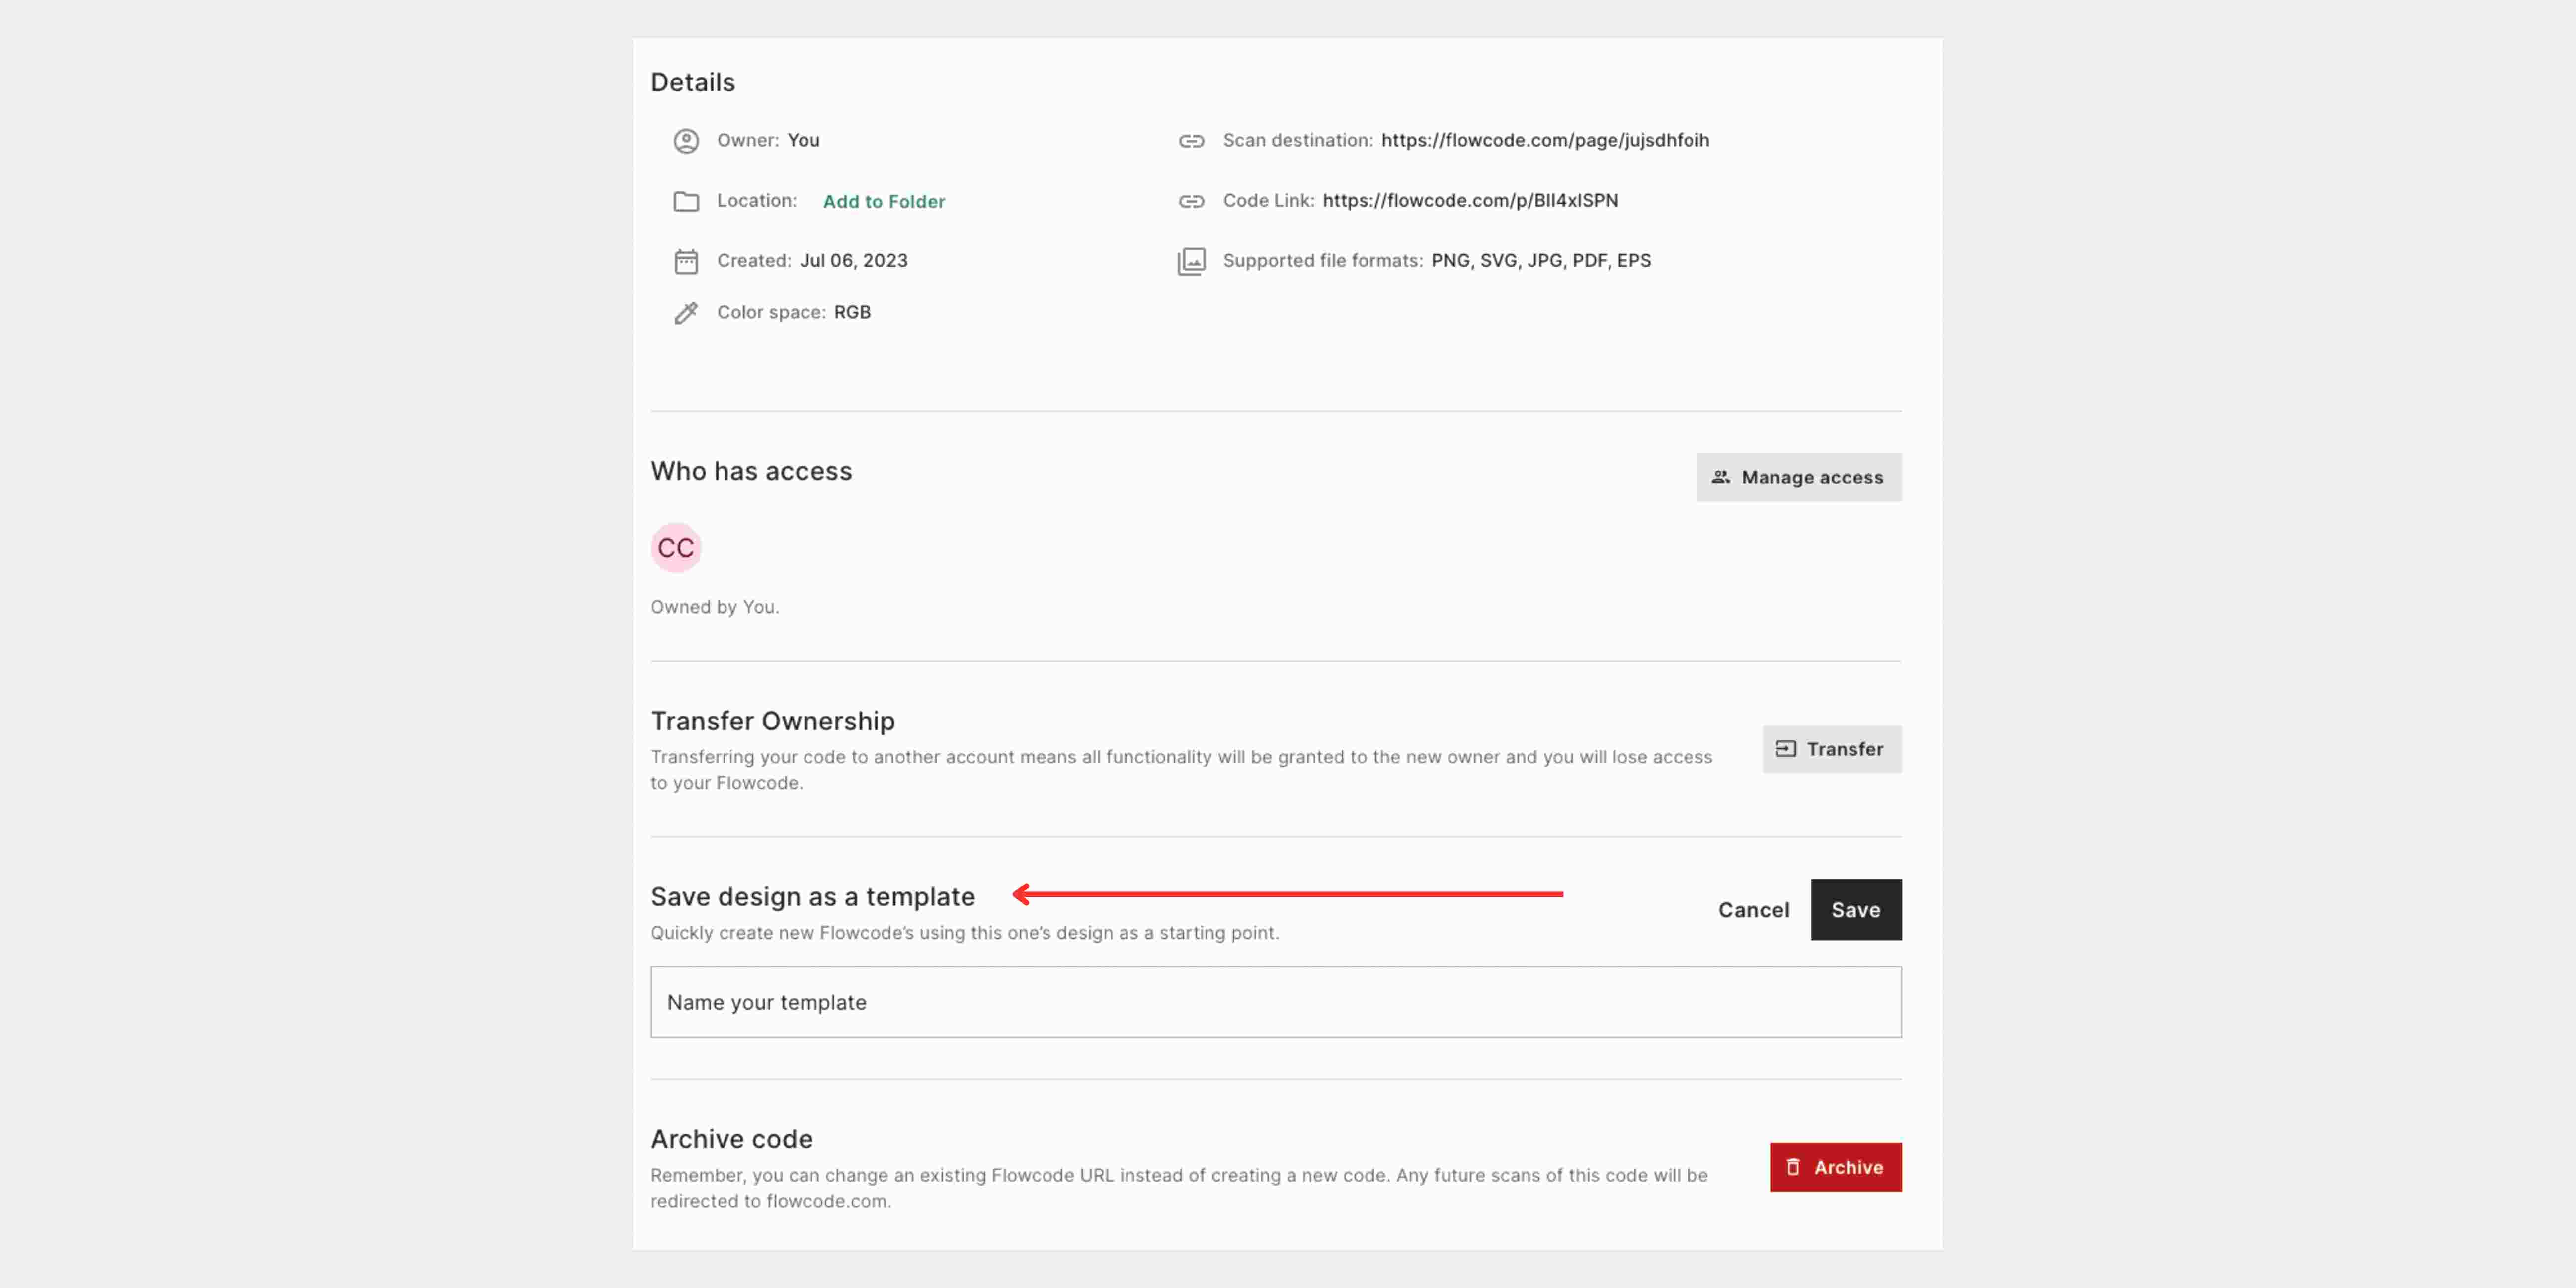
Save A Design in Template
Users can save a design that they previously made as a template to create future designs off of. This feature allows for efficiency and uniformity amongst different codes created by a company.
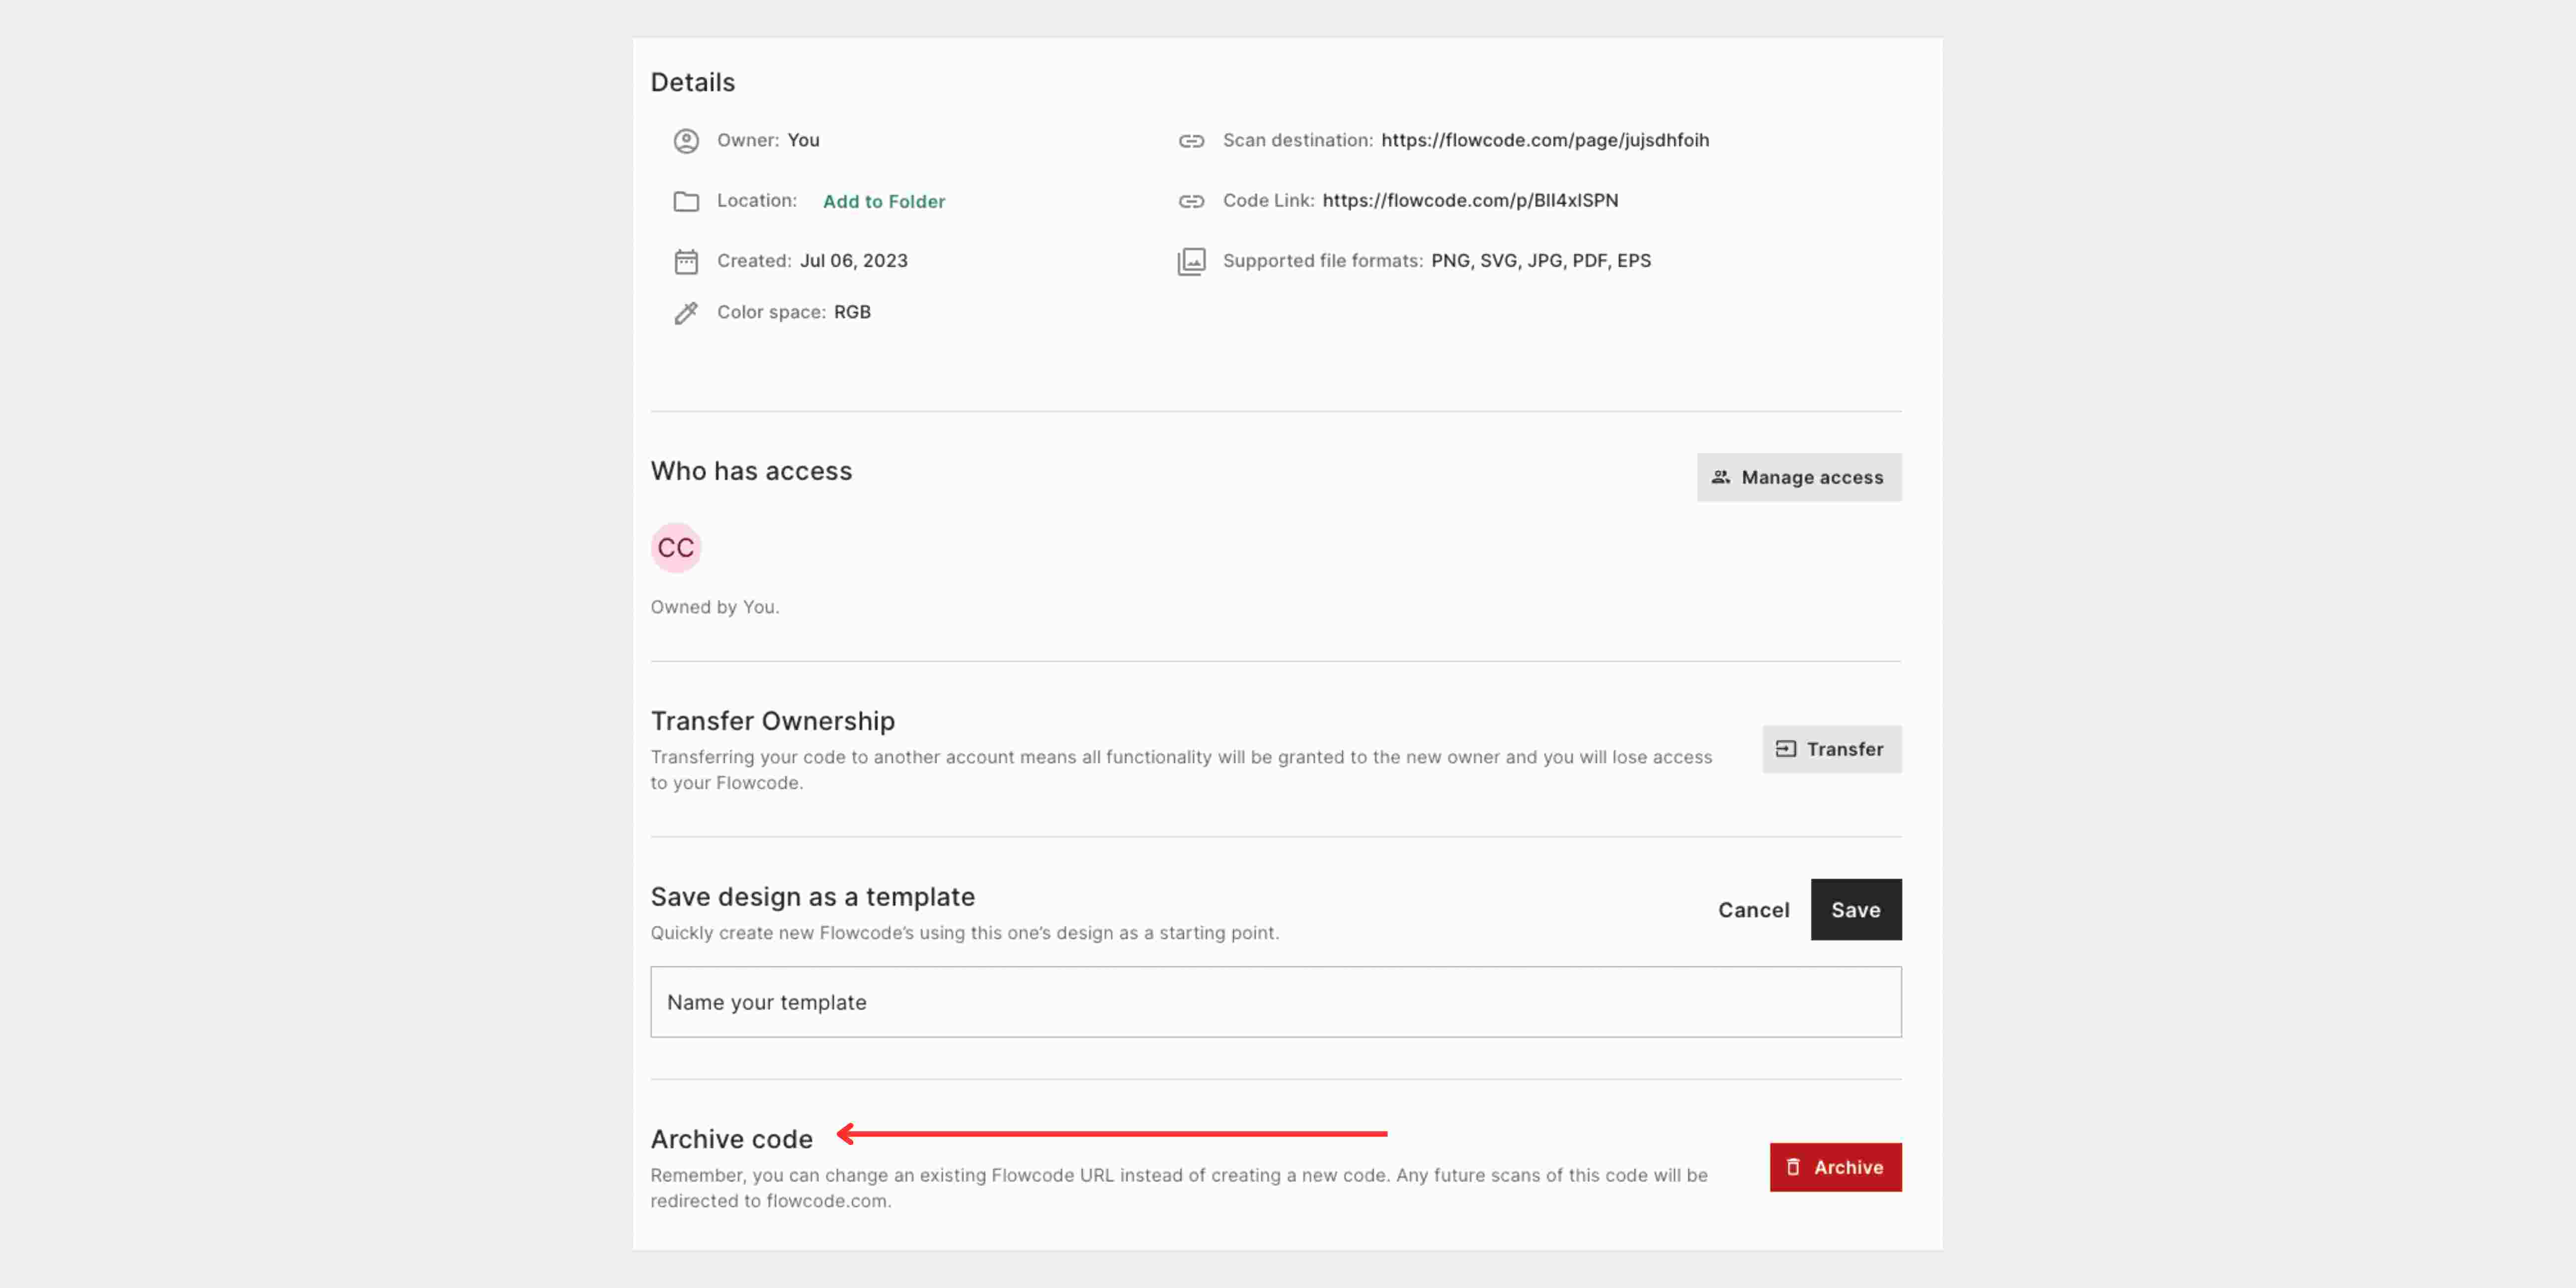
Archive Code
Users don’t need to worry about accidentally deleting a Flowcode as our archive feature is where all created codes will be stored for 90 days! Codes in the archives can be either restored or fully deleted from your account.
In the next post of the Flowcode Onboarding series, we’ll walk you through the importance of printing your code, how to print it, and overall best practices to seamlessly bridge the offline to online gap.